ABCs of Decorating | I

You know, over the years there have come times when I've been asked to describe my style.... and I can't.


I generally say "French Country," but that's not entirely accurate. I also have some elements of "Farmhouse" style and a touch of "Shabby Chic." But there are some really amazing "Boho" accents as well as just a pinch of "Industrial." So, here's the thing: My style is just that: MINE. And I love it. And my family loves it. It feels good and it makes us happy. And that is all that matters.
To see the rest of the posts in this series, click here.
To see the rest of the posts in this series, click here.
ABCs of Decorating | H

Decorating for holidays may seem like a silly extravagance. But what it actually does is make your family and visitors feel like you went above and beyond to make them feel special. How does it make you feel when you wash your hands at a friend's home and the guest towel you reach for is a beautiful reminder of the current season God has blessed us with?
Think beyond Christmas.
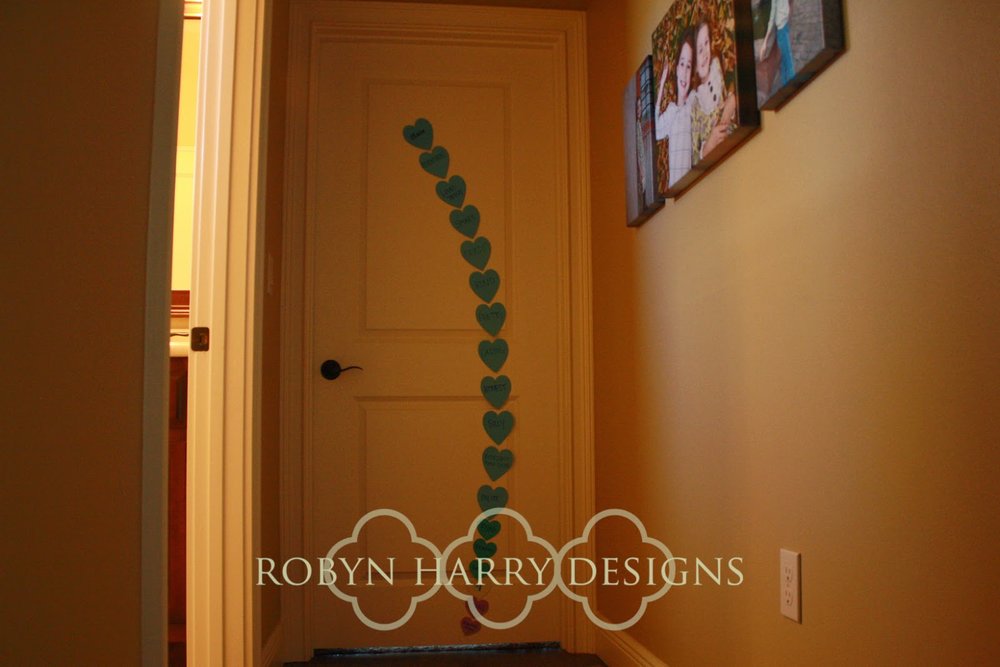
For Valentine's Day:

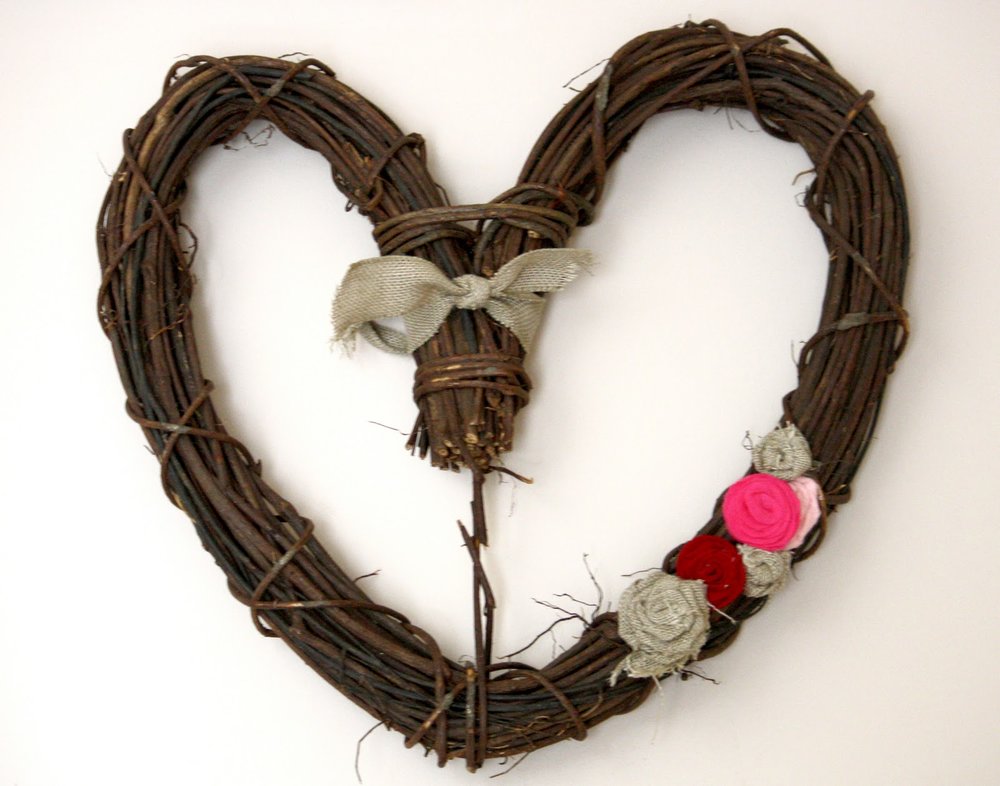
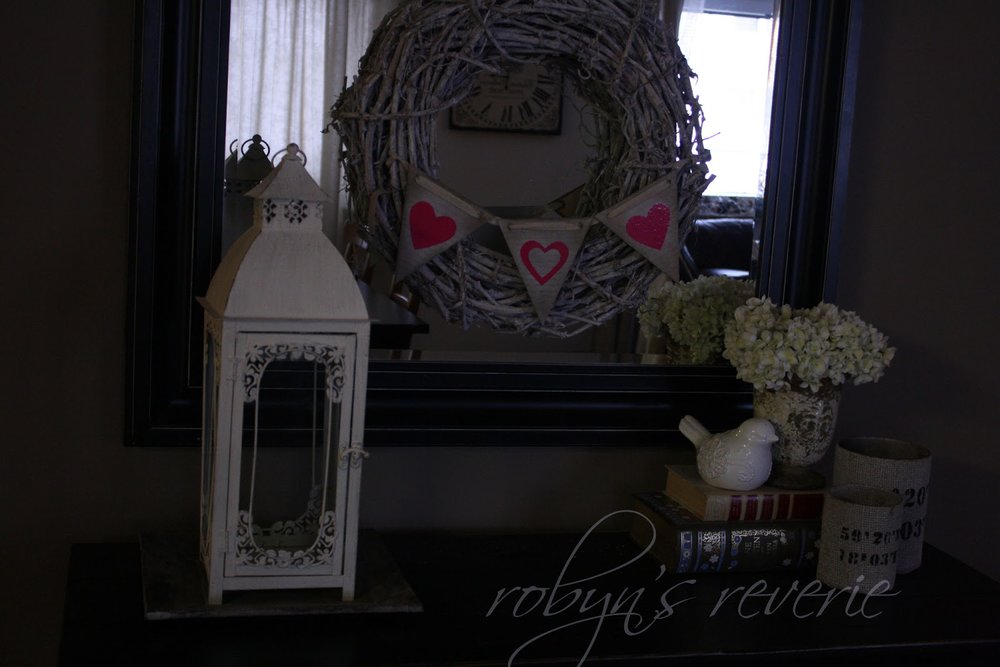
Put together an easy sweater wreath with your kids.
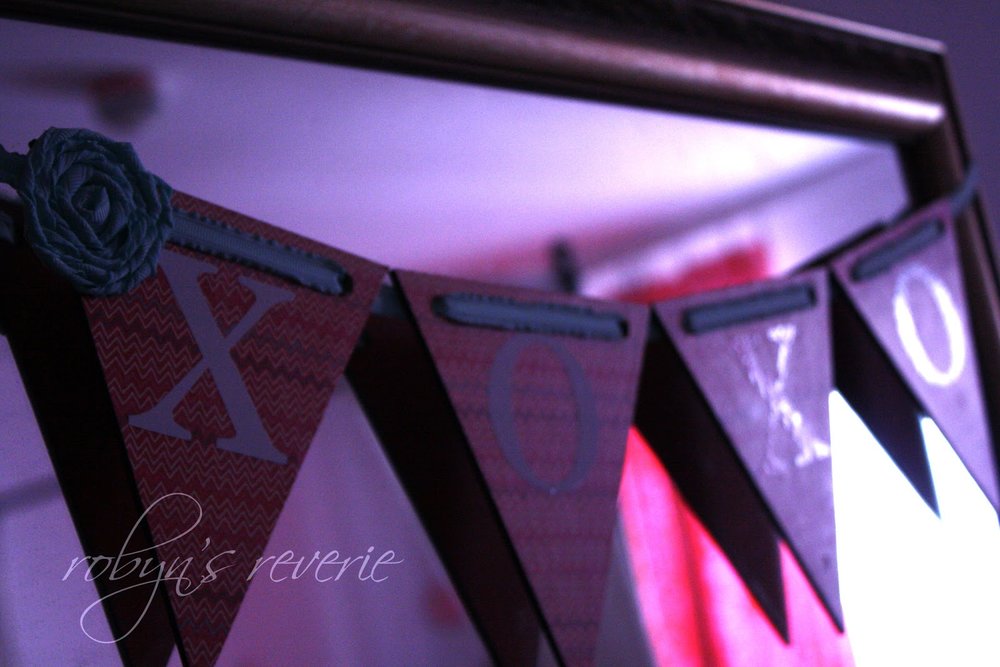
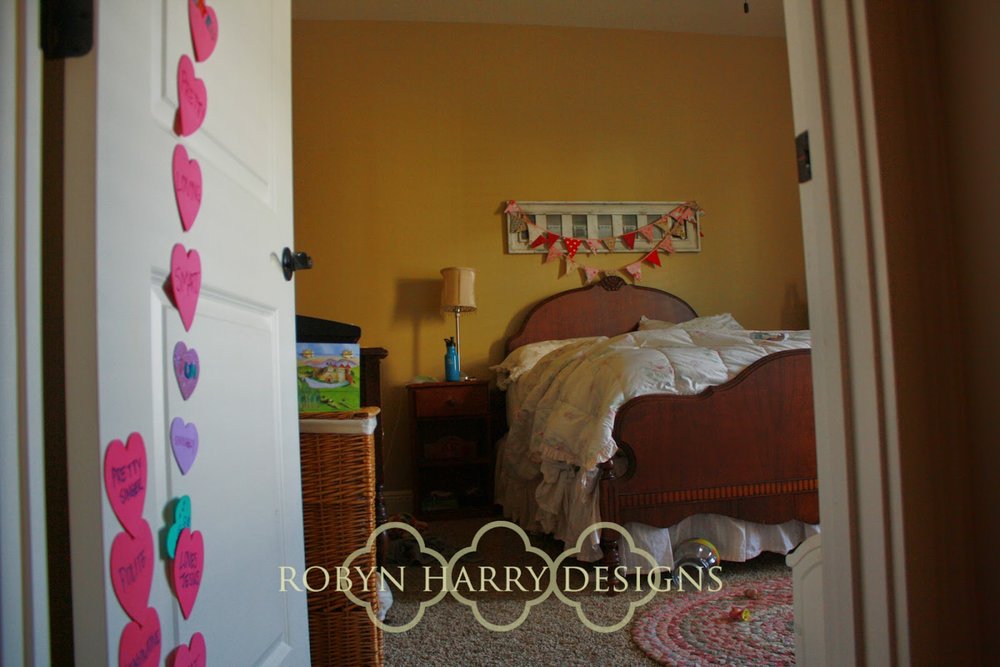
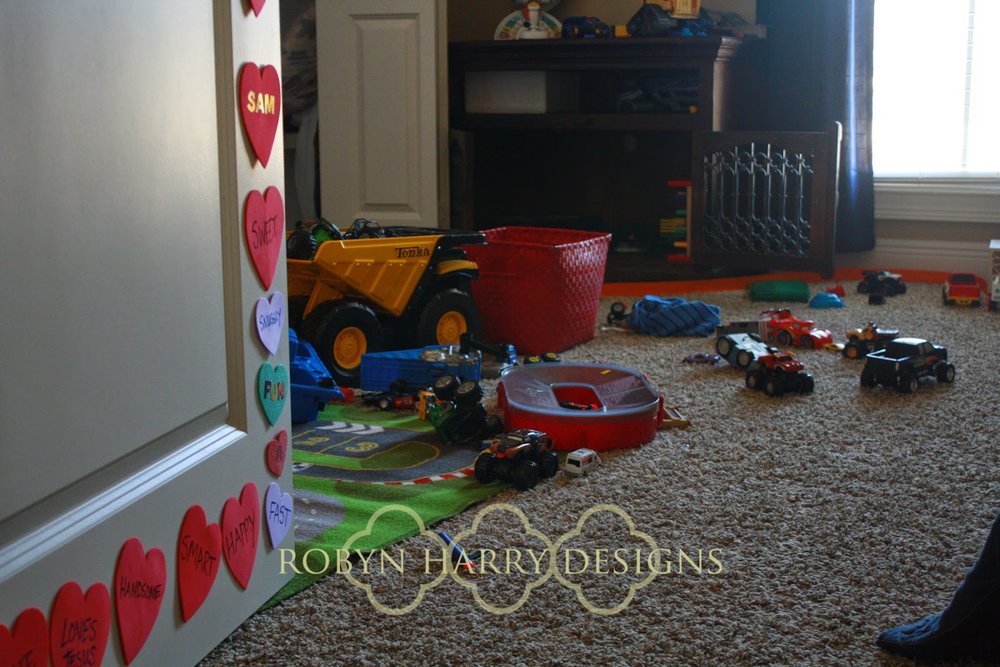
Add a simple banner to a mirror or large picture in your child's room.

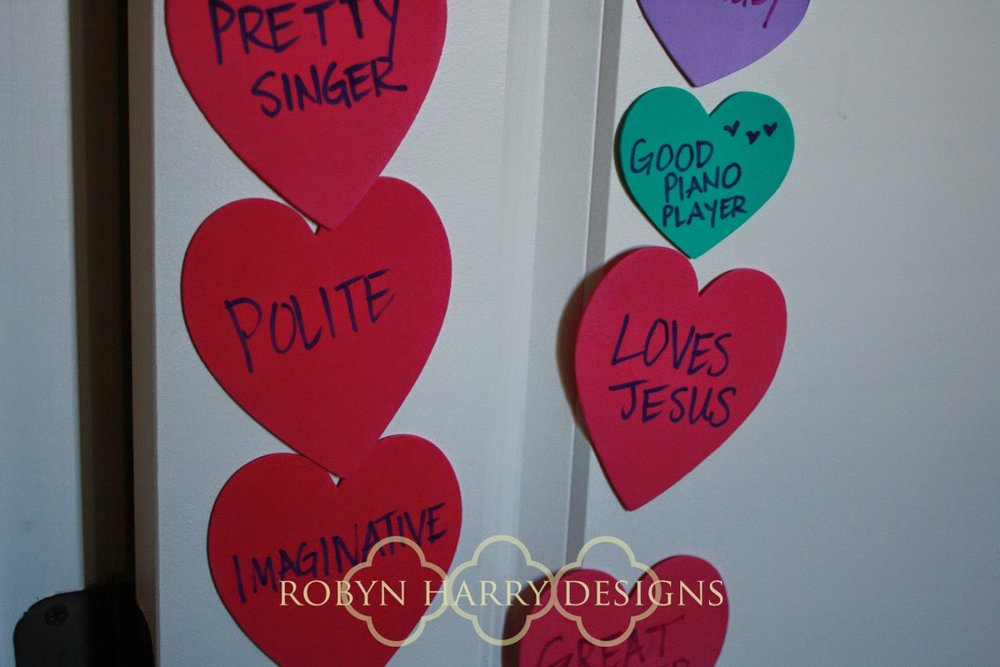
These delicate hearts couldn't be easier to craft.

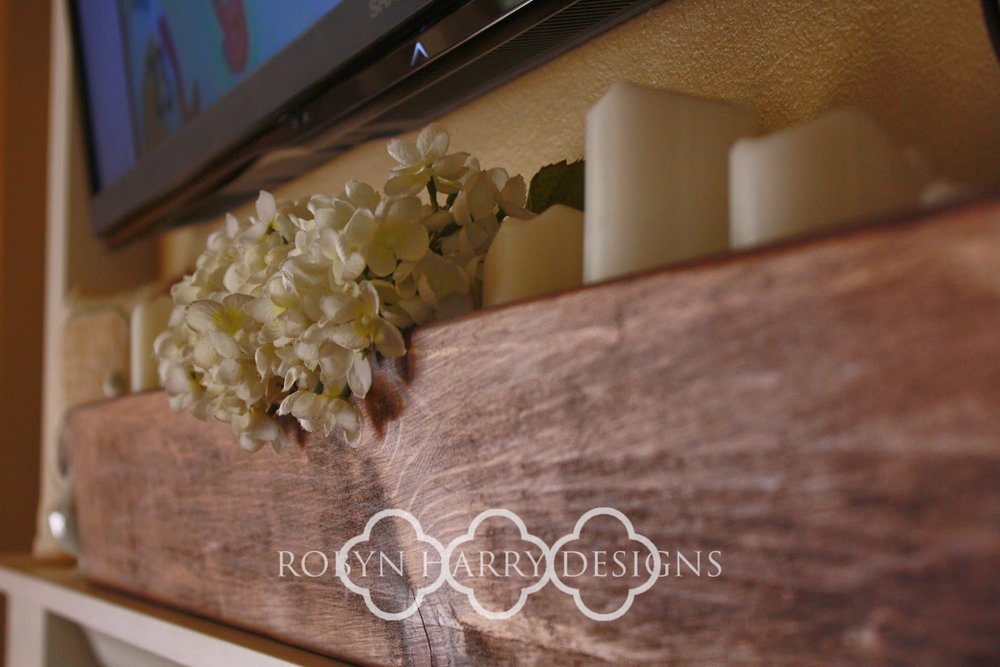
You can even add super subtle decor for St. Patrick's Day. {See what I did there? Four leaf clover wreath, green hydrangeas.}
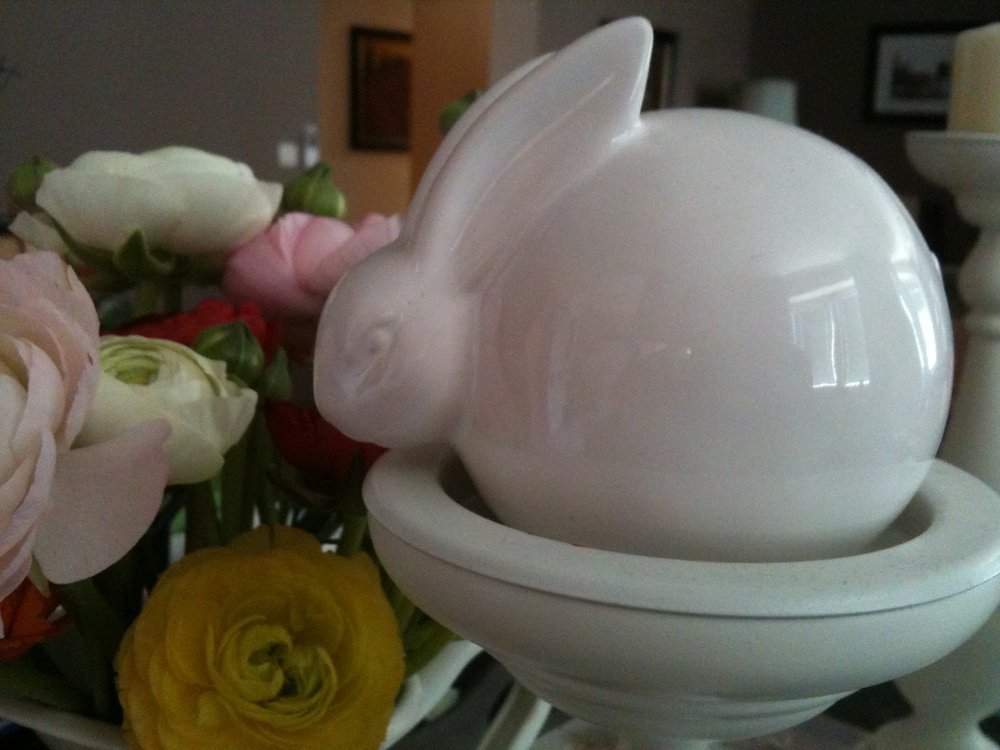
Celebrate Easter with inconspicuous figurines sprinkled in your everyday decor.

Use forced bulbs to add the fresh feeling of spring in a windowsill.
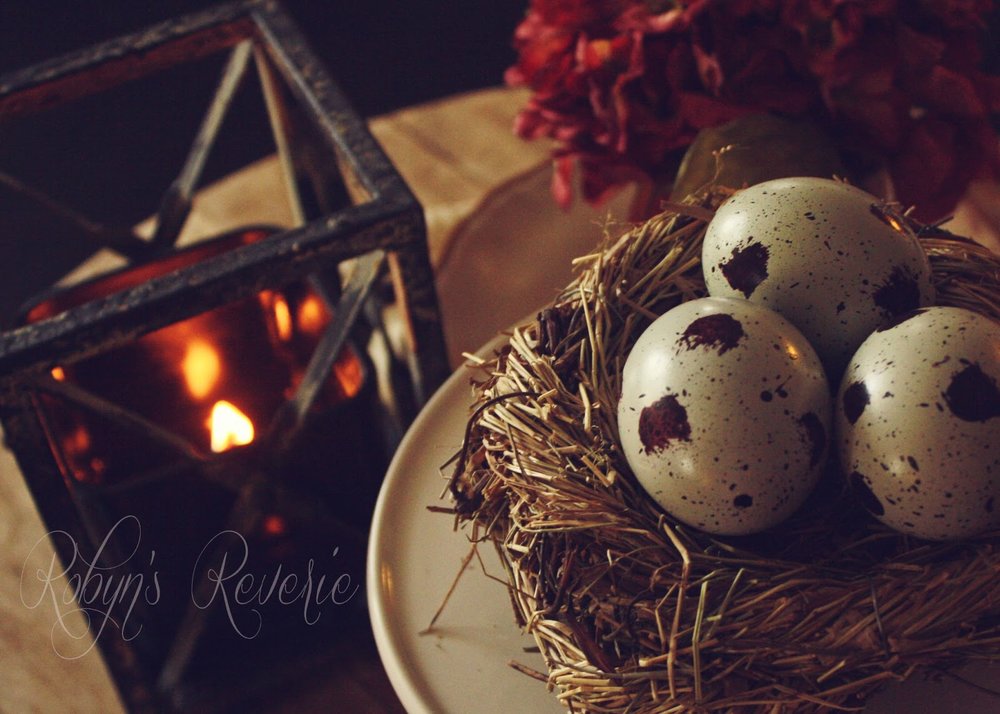
For Easter: Make a centerpiece using a nature inspired nest with faux eggs.
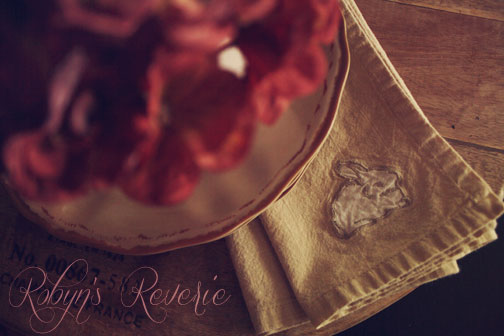
Display tea towels and fabric napkins with simple Easter embroidery.
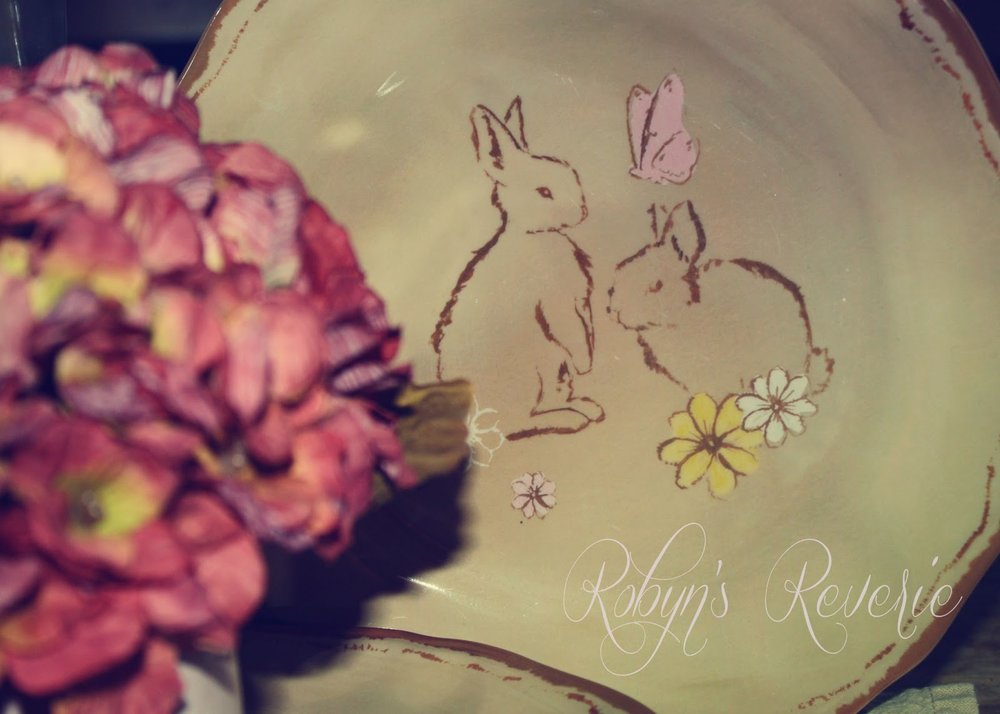
You can even pick up very inexpensive dinnerware and serving pieces at big box discount stores. {I love these from Target!}
And of course, for fall, I have tons of ideas and past posts.
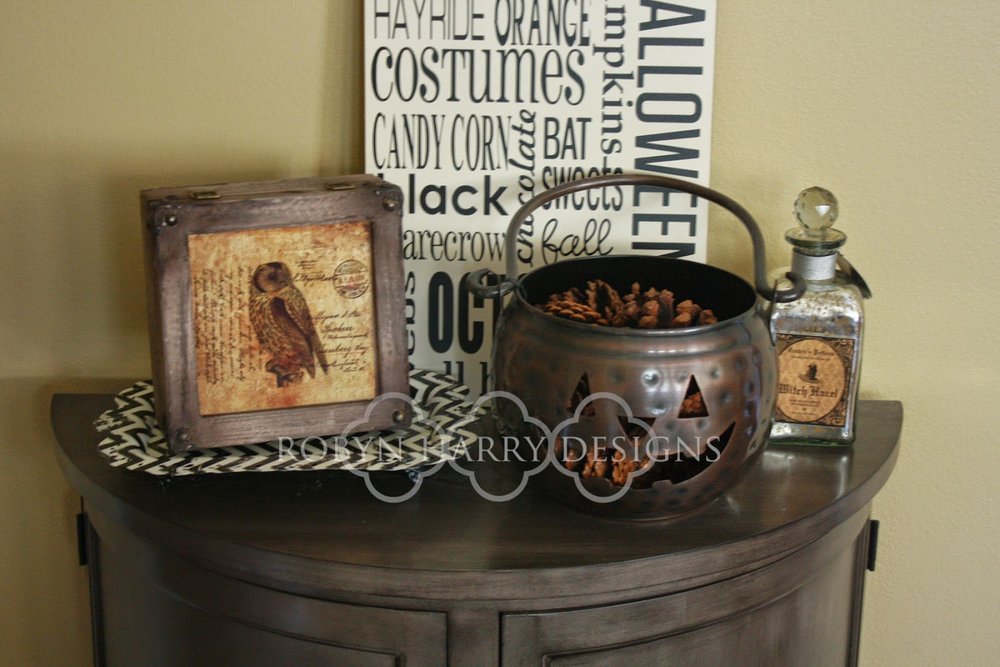
Use neutrals to lend a sophisticated touch to the usual Halloween decor.

Take a cue from nature and add elements that are appear all over at this time of year.
ABCs of Decorating | G

No one lives in a state of stillness. No one. Our lives are forever changing. Up and down, left and right. We never know what is laying in wait around the corner of tomorrow. And in that spirit, our home needs to be filled with grace.
We need to extend that grace to our husbands, our children and even ourselves. Yes. You and I need grace too. Sometimes I need an extra large, heaping dose of it. Thankfully, grace is unlimited.

When I began this series, I aimed to post each new letter on a Wednesday. I've been pretty true to that schedule. All along, I knew G would be for grace. As life does, mine got busy with keeping up with my booth and homeschooling. My blog suffered. I took several months off. When I decided to only do consignment beginning this month, I was happy to return to my blog and this series. As grace would have it, G fell on Ash Wednesday. How appropriate! I was excited to publish this grace filled post on a day that we remember we are nothing without our Father; that we have hope because of the grace He has given us. Well, as God often does, He reminded me how much I need grace. I became sick yesterday and spent much of the day in bed. Nothing got done. I crocheted and that is about it.
This morning as I was sitting at our kitchen table working on spelling with my middle, I looked around at the chaos of our home. It reminded me life happens here in our haven. Everyday.
Life ebbs and flows. Right now, it seems
As I write this, I overhear my two youngest laughing and playing. That is what matters. I don't want to hurt them or belittle them in pursuit of perfection. Their hearts are the ultimate goal in this life of mine.
As a wife and mother, I want this home to be a HAVEN. A haven is a defined as a place of safety or a refuge. This is a place of safety; a place to hide; a place to built up and loved. Yes, cleanliness is often much more comfortable than a messy home. But truly, truly there are times in life where it just isn't possible without paying a price.
Makeover Monday | Union Jack Coffee Table
Yes, I love alliteration. Maybe too much? It sounds clever in my mind and I can't think of anything else more witty for my post titles. I'll be working on that.
So, I have missed the past two Fridays. It's been busy around here, folks. But I've missed doing my regular Friday posts. It's the one constant for me on my blog. Which brings me to a question. What would you like to see more of on the blog? I'm working on developing recurring content throughout the week. If you have any ideas or desires, please share them with me!!!
On we go. I picked up this super cute little accent/coffee table at a local mission thrift store. I thought it was cute and I loved the legs. For the love, I swear I took a before shot, but alas, I cannot find it.
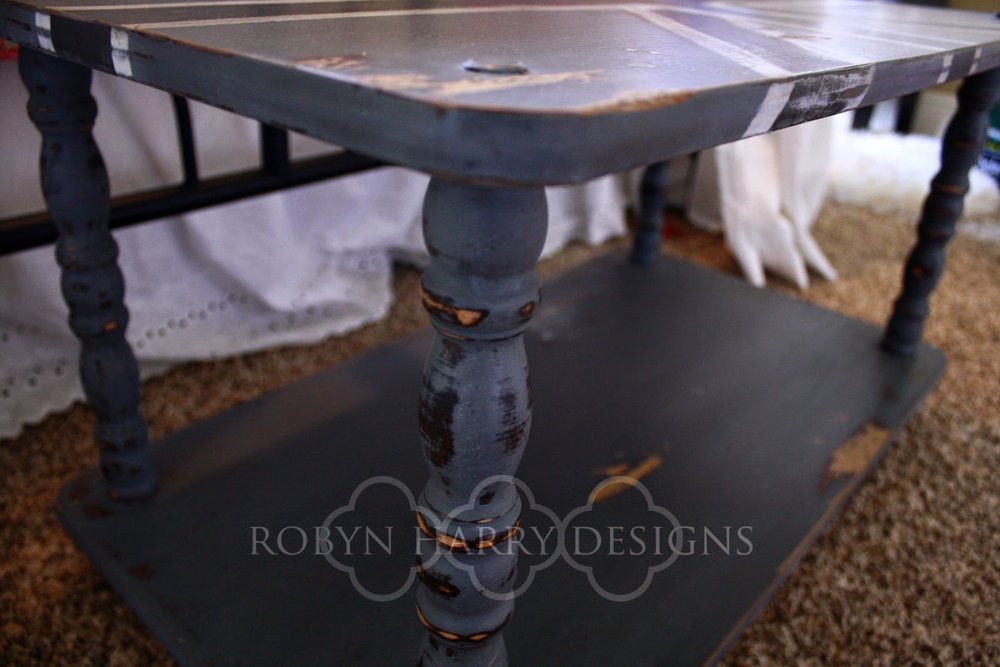
My original intention was to slap some lovely ironstone milk paint on it and call it a day. But then I started painting with a mix of french enamel and typewriter. I came up with a rich grey that had some nice blue undertones.
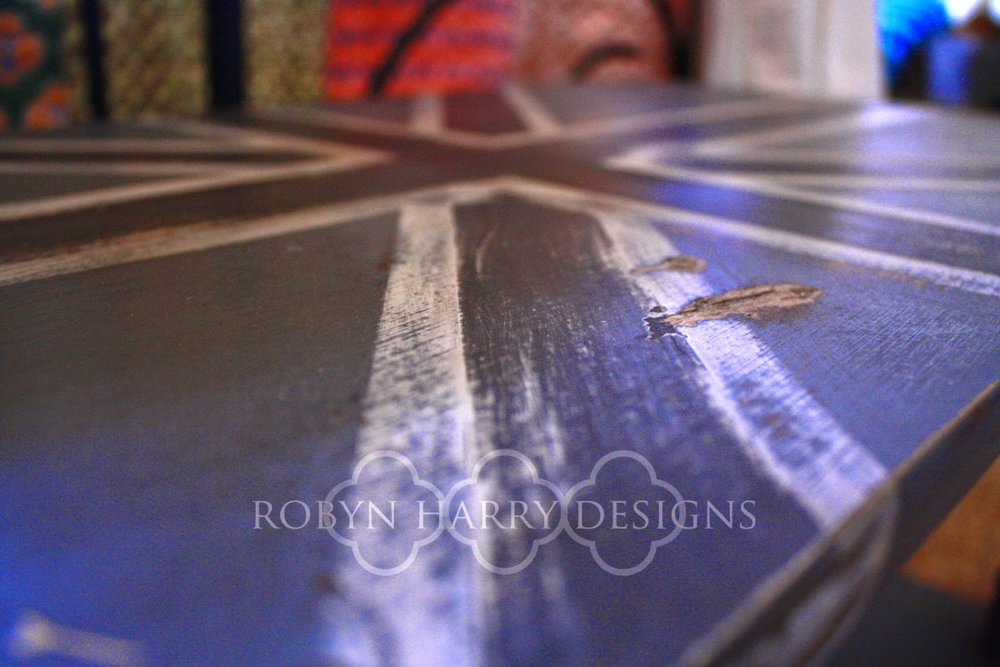
As I was painting the top, I suddenly realized it was the perfect size and shape to try out a Union Jack accent.

I was so excited to try out this design. For the stripes, I used ironstone and typewriter. I definitely needed two coats of each.

This cute little table was not in the best condition when I picked it up. So, I decided to embrace the super distressed look.
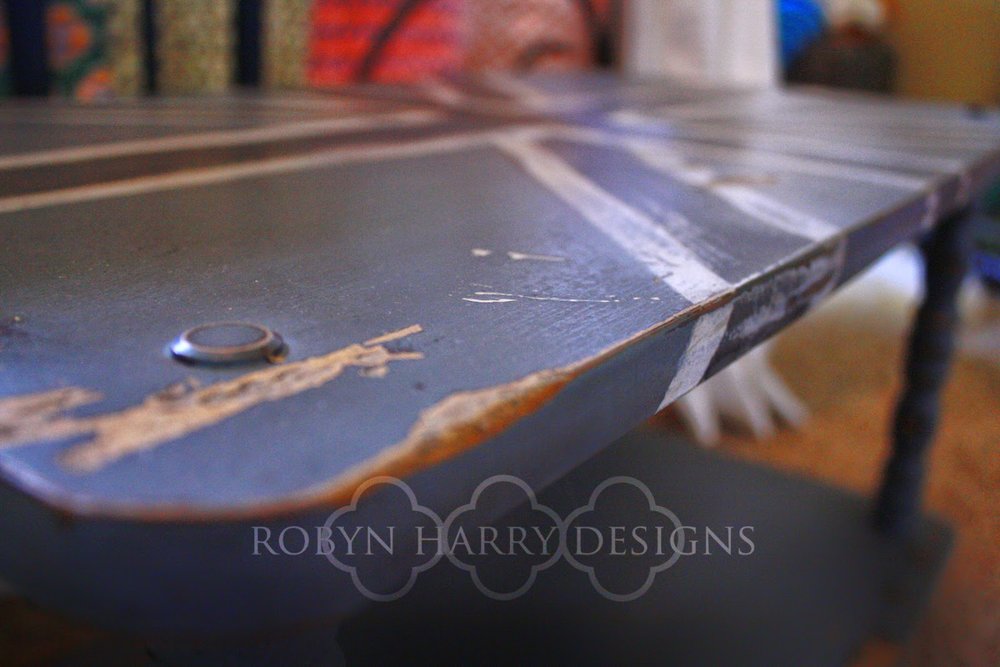
I sanded quite a bit and I even used a razor to add some big chips and marks. It was pretty fun doing this technique and I am sure I will be using it more often.
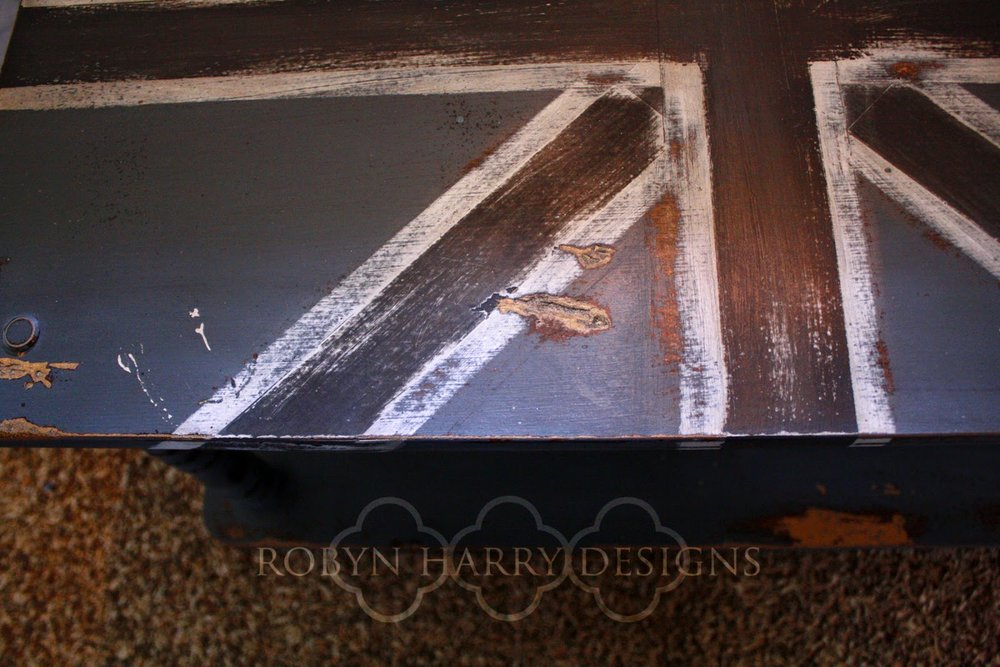
After the paint dried and I removed the tape, I sanded the stripes quite a bit as well. I wanted them to look very worn and blended together. I love how it all turned out.
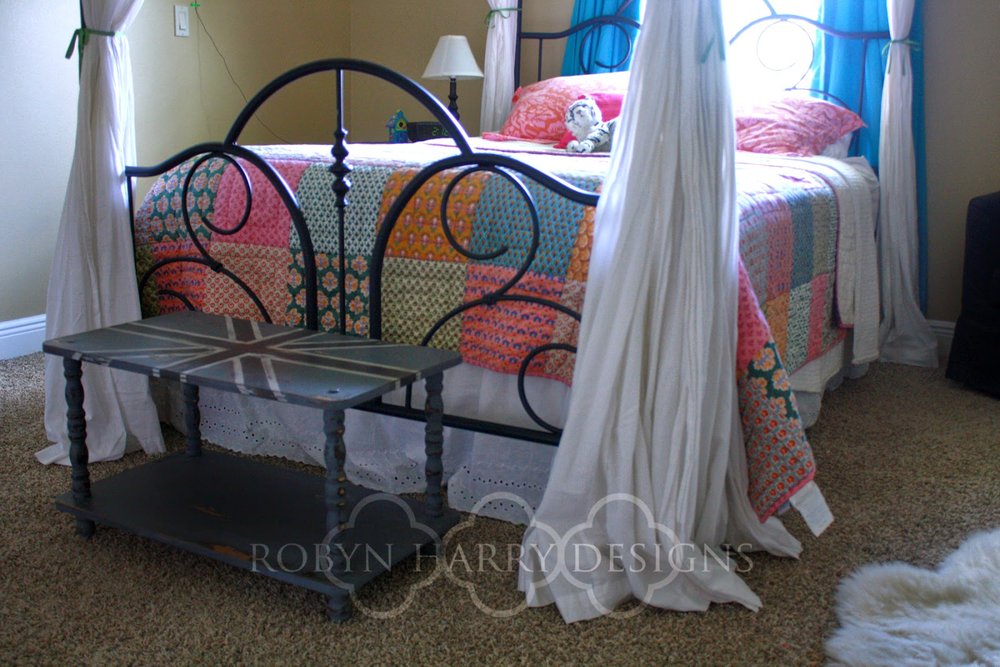
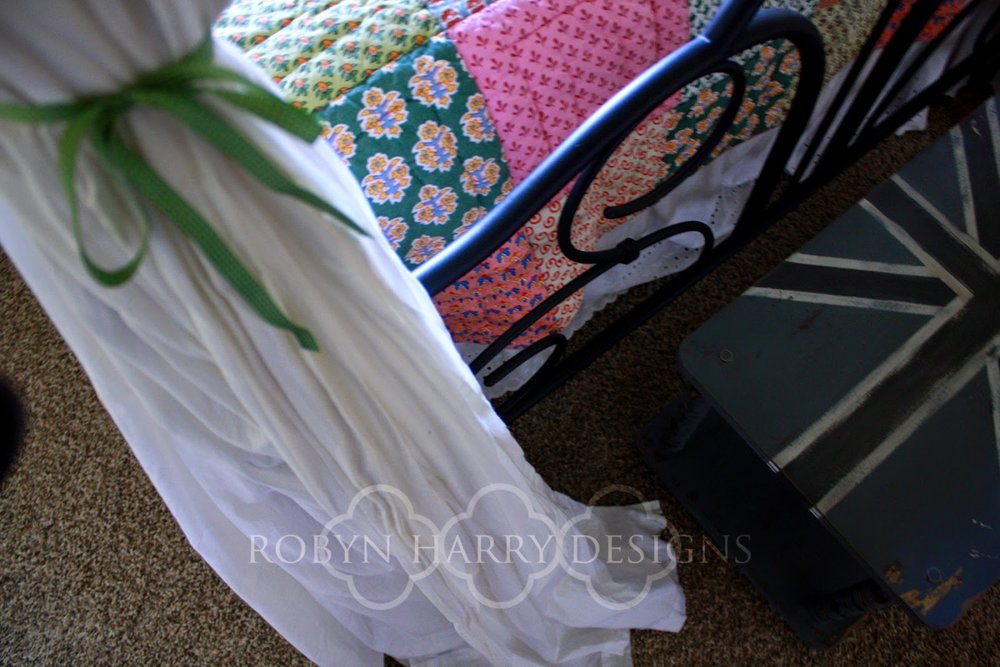
I am loving the combination of this dark, distressed piece with flowy white drapes, colorful bedding, and a lush, faux fur accent rug.
Paint truly is amazing, isn't it? I don't think I will ever stop loving transforming these forgotten pieces into something lovely.

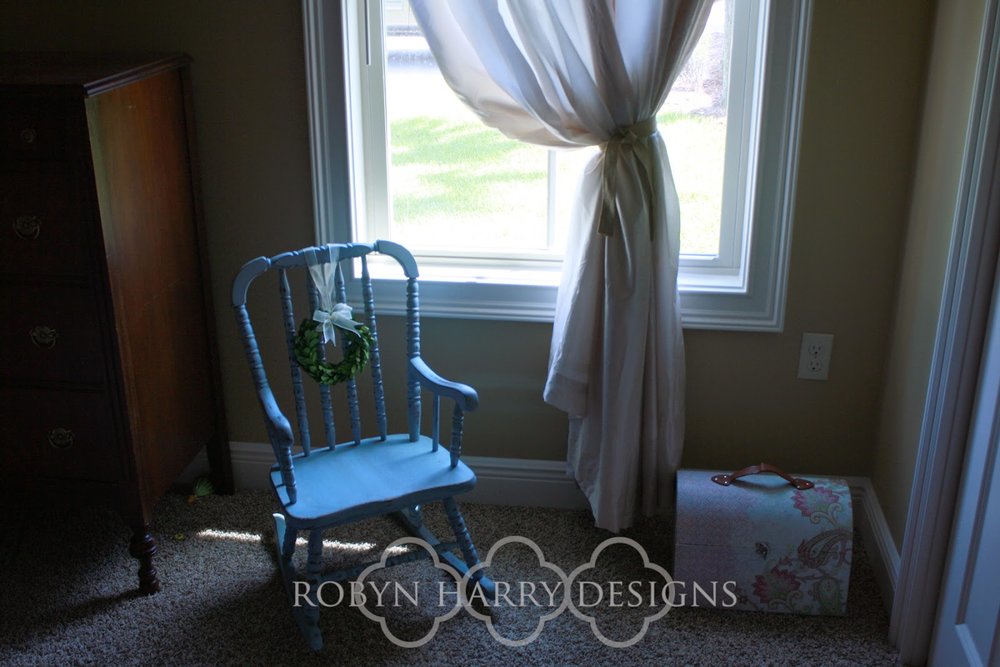
Facelift Friday | Little German Rocker
Today's facelift feature is a fun one. I purchased this sweet little rocking chair from a sweet friend who was downsizing before a move. She told me it was given to her from a neighbor who had purchased it in Germany.
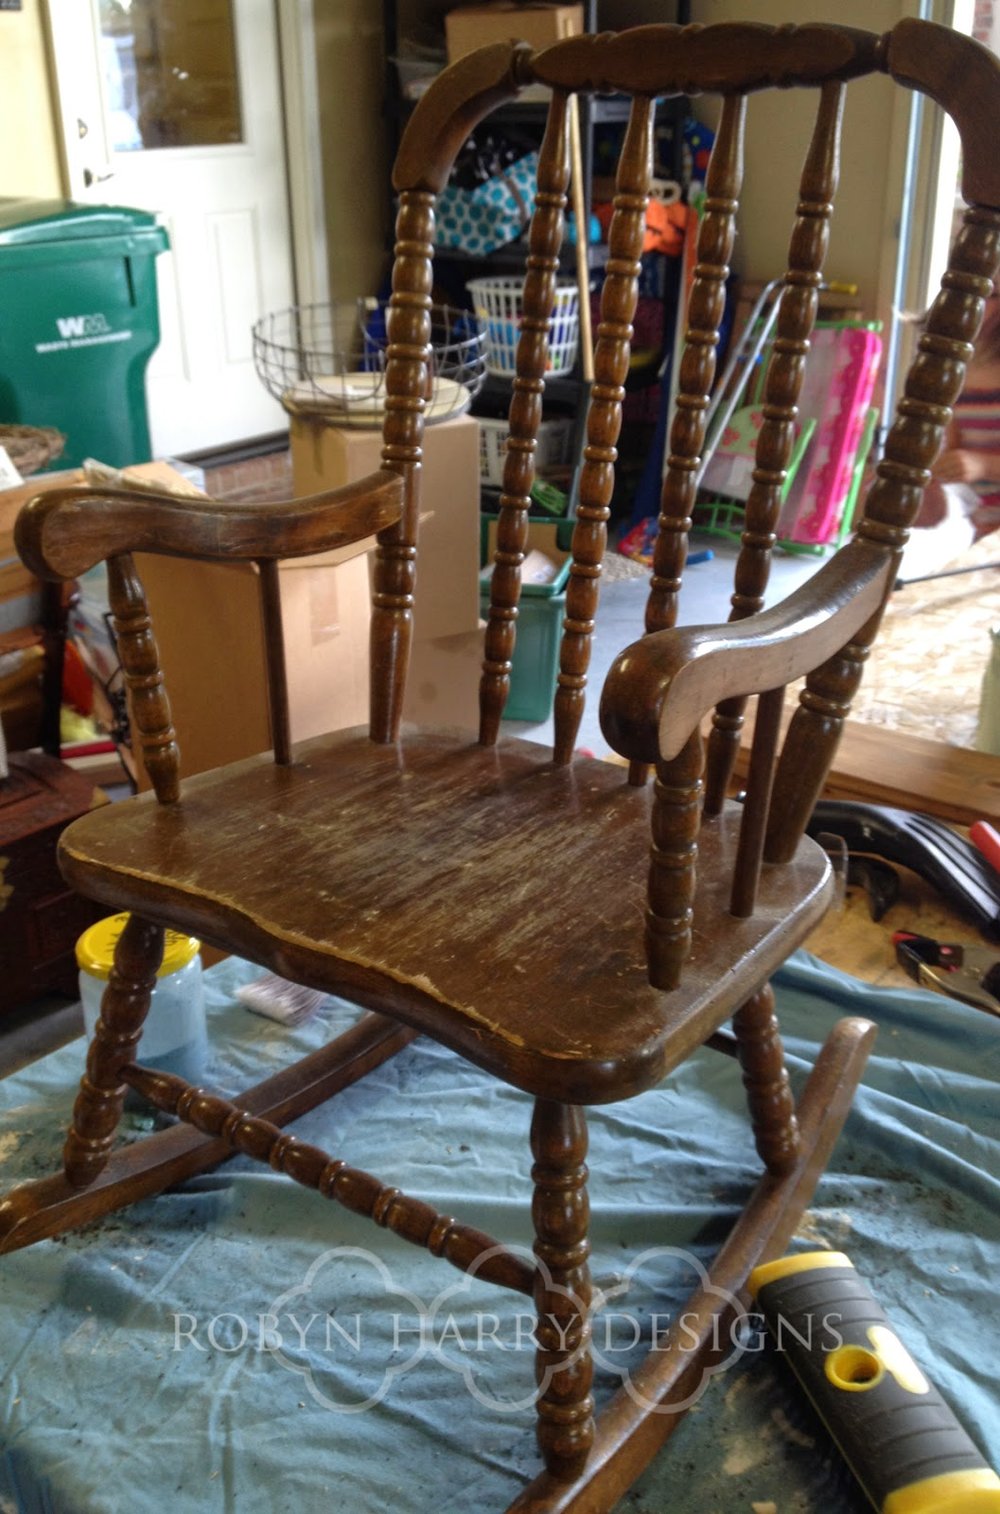

I started with a single coat of Miss Mustard Seed's milk paint in French enamel. It was a little brighter than I'd like and I was also running into bleed through from the previous stain.

Thankfully, I found this post written by Marian addressing such a roadblock. I simply sprayed the entire piece with a clear coat enamel and let it dry overnight. I also added Miss Mustard Seed's bonding agent to the the paint mix.

I now needed to address the brightness of the paint. I simply added more milkpaint in ironstone to the paint I'd previously mixed. It was now the perfect shade of blue.
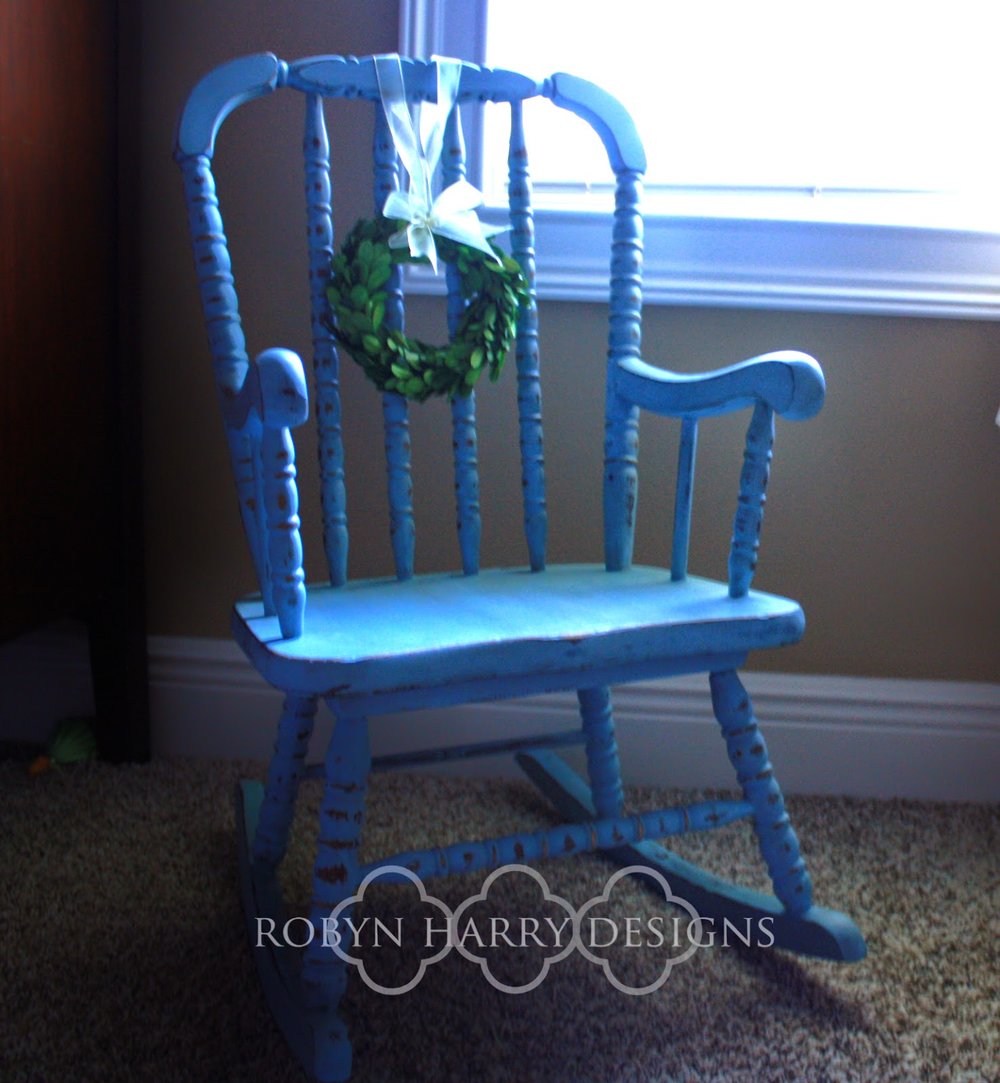
I only ended up using one coat of the french enamel/ironstone mix. I let it dry overnight and when I came back to it, I was not in love. It looked straight out of a 1980's country decor catalog; not quite the look I was going for.
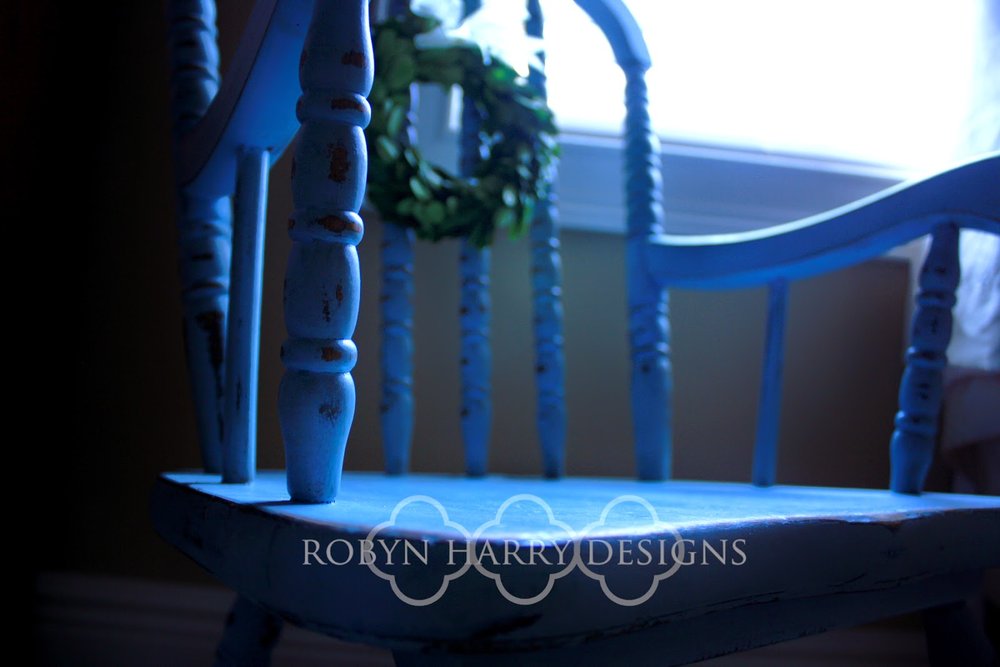
I decided even though it wasn't my style, someone could still love it. I dutifully grabbed my sand paper to smooth down the finish and decided to distress it quite a bit more.
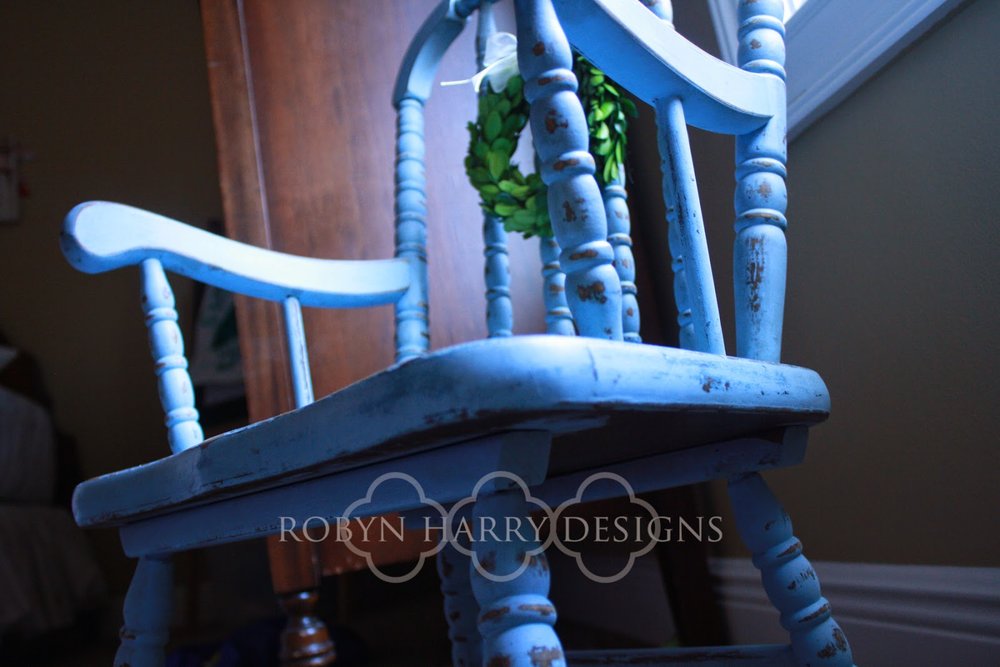
Just look at that chippyness! Now, I was in love.

To further distress it, I used Miss Mustard Seed's antique wax. It dulled the paint just enough and really brought out the chippy distressing.

This little rocking chair turned out so sweet.
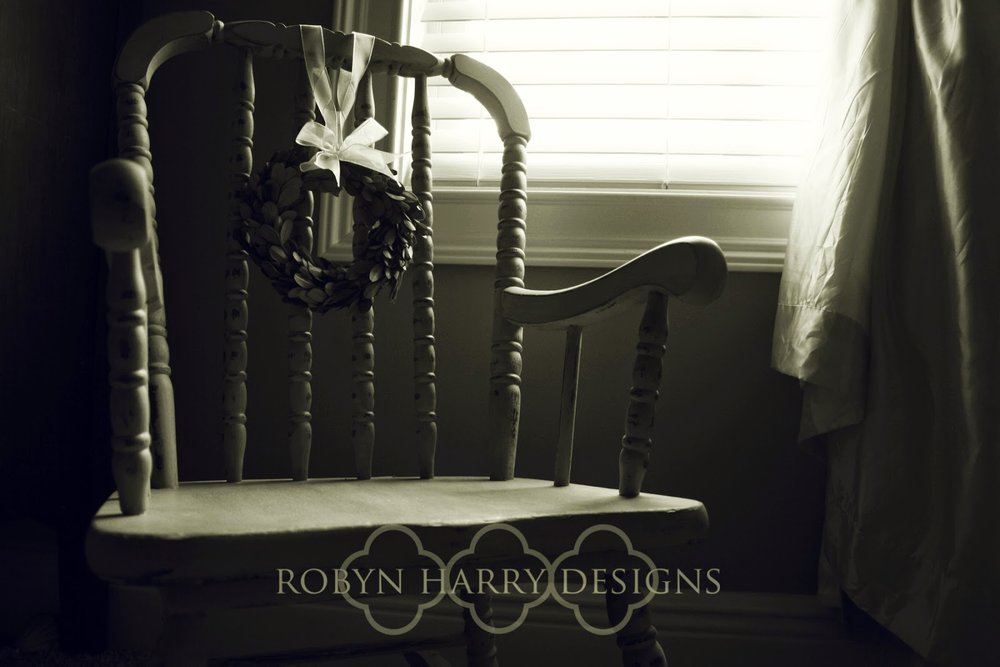
I think it is just the perfect addition to a boy or girl's room. It would even be lovely in a guest bedroom as a side table.

You know, it never ceases to amaze me the difference a little paint and wax can make. I just don't think I will ever get tired of this job.
Settled in, but not settling.
As you probably all know by now, our family relocated to Florida last summer.
It was a rocky start. There were many delays and mishaps and problems.

But when it was all said and done, we had gained a beautiful home that is just perfect for us.

Our entire family has enjoyed crafting and creating personal spaces that are just right.
Slowly, I've been making our home feel as if we've lived here forever.

But, there are still so many things I want to do.
I hope you'll join me as I begin to share more about our new place.
Rainy Day Project | Reading Nook
Just a few days ago, I saw this pin in my feed. I immediately repinned it and went to the original source. Unfortunately, it did not come from a blog post, but rather the flickr feed of Kim Rakes. Happily, the idea was simple: Use a tension rod between the wall and a piece of furniture to create a small nook for your child. Seeing as how I have about 13 tension rods in our storage space, I decided the project was simple and easy enough to do right away. I ran downstairs, grabbed one, and got straight to work.

Here is my daughter's room from the doorway. You can hardly see the awesome little space we created. It blends so nicely with the rest of her room.

For the curtains, I just used some old curtains that were folded up in my linen closet "just in case." This was the perfect reason to dig them out.

I added a pillow chair, a favorite quilt, and throw pillow on top of this super soft, super comfy faux sheepskin rug. Don't you want to climb in?

The roof is actually a remnant from some of my favorite window sheers. I bought them at IKEA, so they had to be cut to size. My daughter had been saving them in her closet for fort building.


For the curtains, I just used some old curtains that were folded up in my linen closet "just in case." This was the perfect reason to dig them out.
I added a pillow chair, a favorite quilt, and throw pillow on top of this super soft, super comfy faux sheepskin rug. Don't you want to climb in?
The roof is actually a remnant from some of my favorite window sheers. I bought them at IKEA, so they had to be cut to size. My daughter had been saving them in her closet for fort building.
We both agreed the remnant was perfect for the roof because it is beautiful and functional. A good amount of sunlight still makes it's way into her nook thanks to the sheer roof.
And here is my happy customer working on schoolwork in her new favorite spot. This was definitely one of my favorite projects. It was easy and totally free. You simply cannot beat that.
Our Homes, Past and Present | Troy, Illinois
In the next couple of weeks I hope to share with you all several photos of our homes in the years past. We have been very fortunate to live in some beautiful places with wonderful people. Our adventure isn't over yet! We will be heading back to the States within the year!
Our very first home was an apartment in northwest San Antonio. Did digital cameras exist back then? They may have, but we did not own one. Our second home was in Edmond, Oklahoma and we loved it. It was our first house. We had amazing next door neighbors, a wonderful church and amazing friends. Digital cameras had been invented during this time, but we still did not own one. I hope to dig up some pictures soon.
The third place we lived together was in Troy, Illinois: right outside of St. Louis. It was one of my favorite houses. Our neighbors there were incredibly warm and friendly.

Looking through my pictures, I can't believe how much my decorating style has changed. We sure loved red!


We finished the basement to add a family room and a guest bedroom. Love the color palette in the guest room.(Minus the red, of course.) Whew! That is a bright green in the family room.


I think in hindsight, Kate's nursery is my favorite. Obviously, that is due to the very soft color palette and the large amounts of vanilla coloring. It was so relaxing to me then as a mom of a newborn and a nearly 3 year old. It still invokes feelings of relaxation in me today.


 Oh, that bed. Our basement flooded in Rhode Island and I was more worried about my bed than my wedding dress. True story. Love it so. I haven't gotten to use it in nearly FOUR years. It wouldn't fit up our turning staircases in Rhode Island, so it lived in the basement. When we found out we were moving to Germany, we decided to leave it in storage. It was a good thing as it would never have fit in our bedroom in Simmozheim!

Loved our back porch and yard. We ate outside very, very often!

Our house backed up to a farm. We had a lovely view of rows and rows of corn. We loved it there.

Our very first home was an apartment in northwest San Antonio. Did digital cameras exist back then? They may have, but we did not own one. Our second home was in Edmond, Oklahoma and we loved it. It was our first house. We had amazing next door neighbors, a wonderful church and amazing friends. Digital cameras had been invented during this time, but we still did not own one. I hope to dig up some pictures soon.
The third place we lived together was in Troy, Illinois: right outside of St. Louis. It was one of my favorite houses. Our neighbors there were incredibly warm and friendly.
Looking through my pictures, I can't believe how much my decorating style has changed. We sure loved red!
We finished the basement to add a family room and a guest bedroom. Love the color palette in the guest room.(Minus the red, of course.) Whew! That is a bright green in the family room.
I think in hindsight, Kate's nursery is my favorite. Obviously, that is due to the very soft color palette and the large amounts of vanilla coloring. It was so relaxing to me then as a mom of a newborn and a nearly 3 year old. It still invokes feelings of relaxation in me today.
Claire's room is a very, very close second. She also had a very soft color palette with very light shades of rose and aqua.
Loved our back porch and yard. We ate outside very, very often!
Our house backed up to a farm. We had a lovely view of rows and rows of corn. We loved it there.
The Makings of a Boy's Room | Part 5

For the last post in my labor of love series on creating a fun, well designed boy's room, I am going to focus on the unique accessories. These are meant to be used as ideas; something to spark your creativity. If we all used the same accessories, they wouldn't be quite as unique.
On top of my boy's armoire are a few unique and very special items that go nicely with the rest of his room. The boots are authentic cowboy boots that were completely worn out by my very own husband as a child. (I also have a pair of my very own, but I wore the sole off of them and they need to be repaired!) These boots are important to me for obvious reasons.
The flag is one that was given to us by my husband's office and was flown at the capital of the United States. It was completely unexpected and completely appreciated.
The vintage book is titled, "Cowboy Sam" and is perfect for... obvious reasons.

This picture is a reprint of a genuine reward poster from the 1870s. They were hung all over central Texas in hopes of finding this infamous outlaw. It is especially cool because Bass actually happens to be my son's middle name.

These bamboo teethers are a set I found on Etsy made by little sapling toys. I hand picked the three I felt went with the whole Texas theme: a star, a coyote and of course, the beautiful state of Texas.

Lastly, I just want to highlight one of my favorite things to do in a kid's room. I love to mix functional decor with playful decor. Obviously, the playschool barn is a toy, but it goes so well in this room. The rocking horse is also a toy, but nestles in here nicely. This storage box is a random piece my mom found for me at a gift shop going out of business. I love the beautiful horses on it. It is perfect to pretty up the room. And it is perfect to store matchbox cars. That, my friends, is what I call great design.
The Makings of a Boy's Room | Part 4
Add Complimentary Storage Options
One thing is for certain: When you have a baby, you will need storage. In the infant months, it's for diapers, wipes and burp cloths. With toddlerhood comes the invasion of toys and the collection just keeps growing from there. It's best to think about storage options from the beginning. I like to try to find versatile pieces that will grow with our needs.
The Expedit Shelving Unit from IKEA is one of my favorites for this reason. We actually purchased it to store toys in our girls' room. When we moved, it became a storage/display piece in the baby's room.

And as he's grown, our needs have changed. We turned it horizontally once again and it's the perfect height for him to play with his toys on... or to climb on and look out his window.

Another one of my favorite storage options is this laundry basket. I know it sounds crazy, but the color of it works nicely with his room and it's just perfect for throwing in those random toys at the end of the day.

And of course, there is the armoire I discussed in my Part 3. No matter what storage options you choose, remember to think outside the box and to think towards the future!