Halloween Decorating

September is FINALLY here. Yes, it's one thousand degrees here in Florida, but I am bringing in all the things of fall as soon as I can possibly manage. I have already loaded up on things for my shoppe at Old Time Antiques. If you are in the area, make sure you stop by. There are many talented people in this collective. You will not be disappointed!
Today I am going to share some ideas about Halloween decor. I know Halloween is not necessarily something you'd think of decorating your house for, unless of course you are going for the haunted house on the block. But I'd like to show you that it can be fun AND chic.

My main goal when decorating for holidays and seasons is to seamlessly fit special occasion items among my everyday decor. For instance, I use a lot of neutrals and European inspired decor in most of my home. So, when shopping for seasonal accents, I search out pieces that have the same tone.

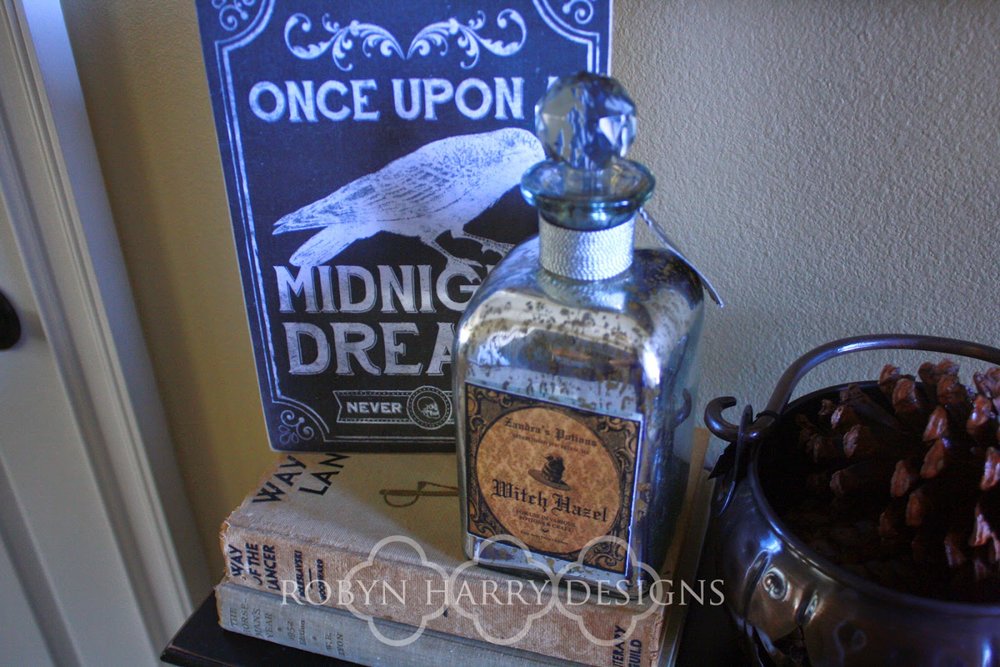
This wooden owl box is a lovely example. It is all neutrals and has the German script on the top. This is one of my favorite finds for Halloween!
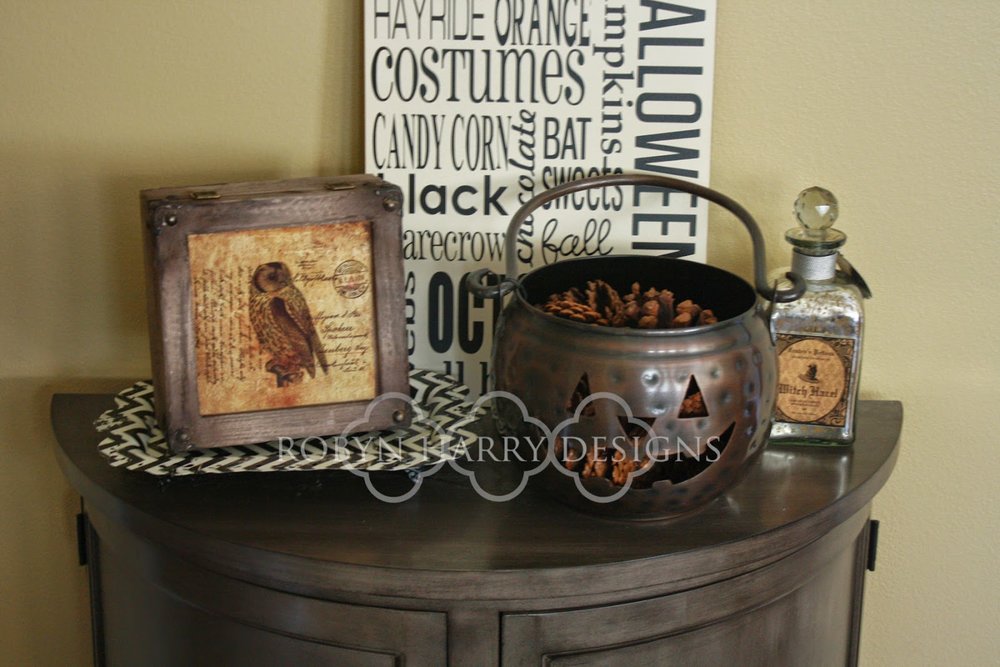
The metal jack-o-lantern is also neutral colored and the pine cones add a touch of nature. The black and white chevron tray mirrors many of the black and white elements in my own home.
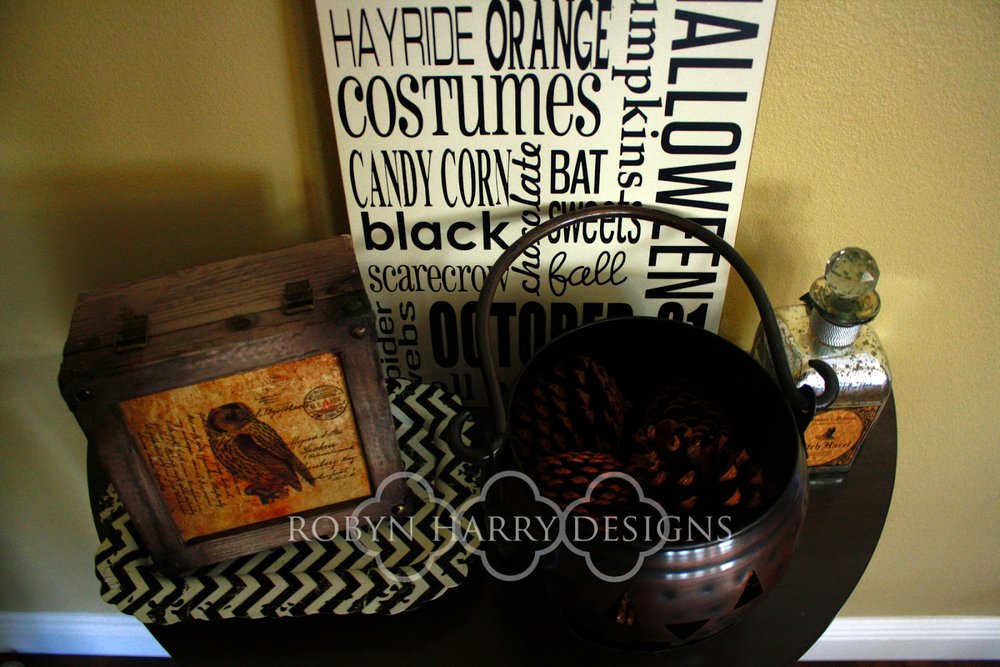
This adorable Halloween subway art also mimics many of my everyday accent pieces.
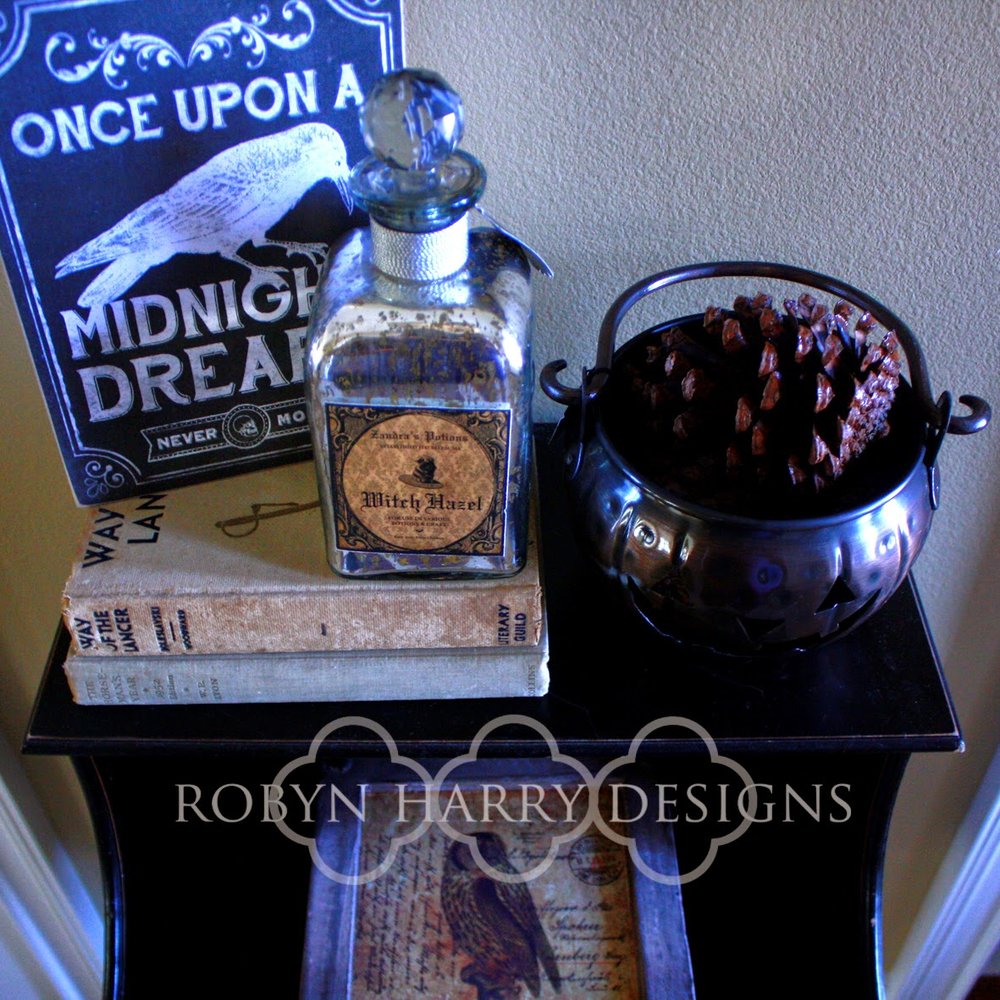
The pieces I chose for Halloween decor fit nicely with my collection of white and black antique books.

Hopefully, I have shown you Halloween decor can be pretty, easy and fun. It doesn't have to be scary or cheesy (although there is certainly nothing wrong with that either!). If you have any questions about decorating for the seasons, please feel free to contact me. Remember, I also offer holiday decorating options!

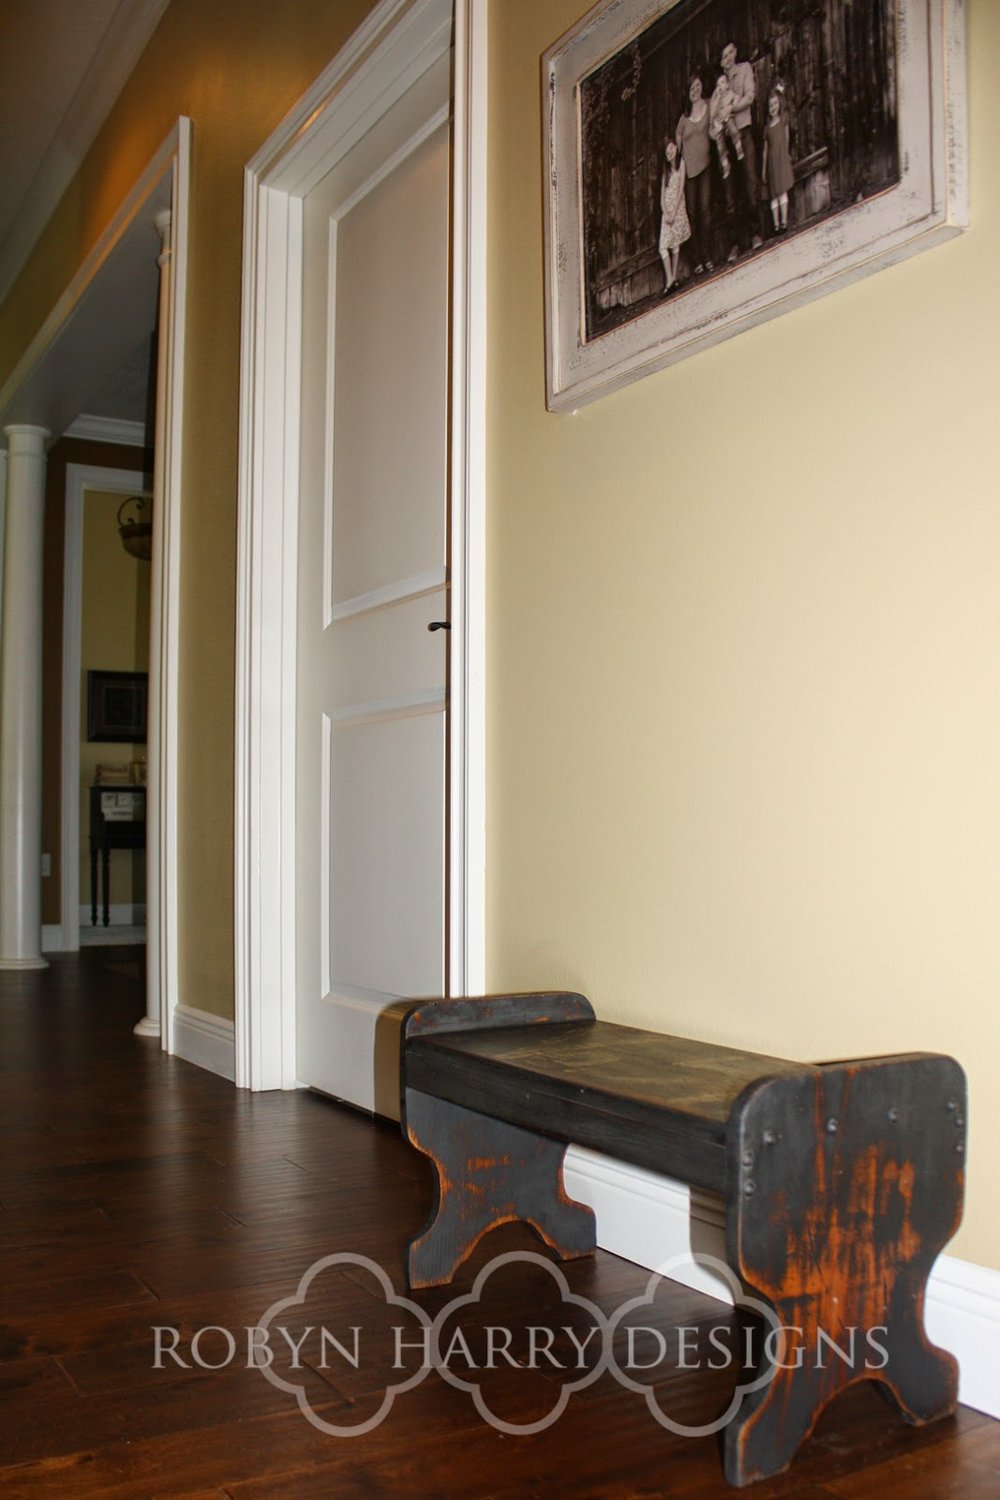
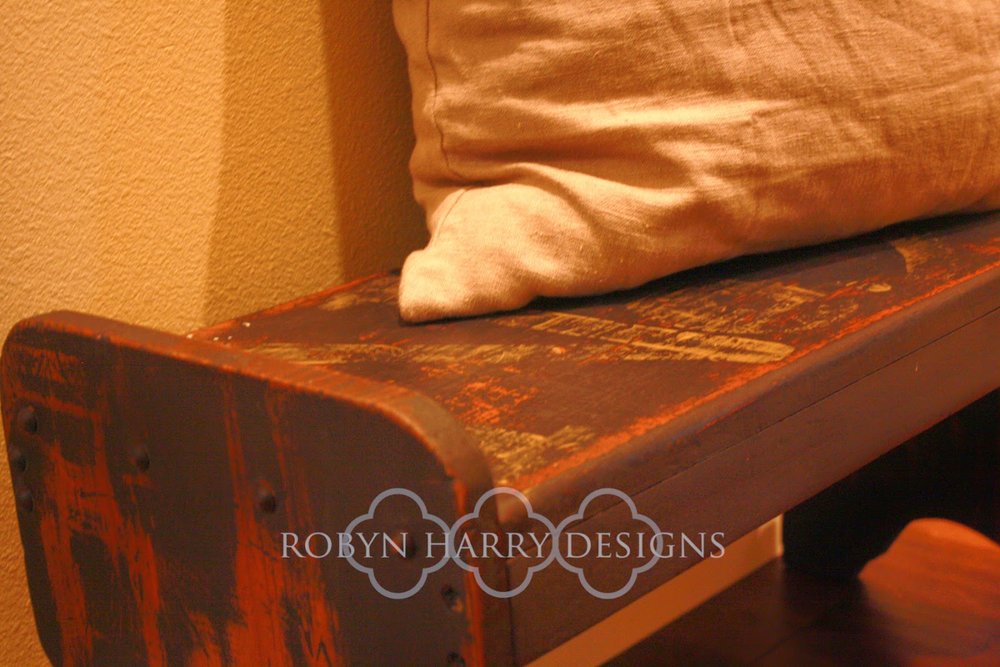
Facelift Friday | Handmade Stool
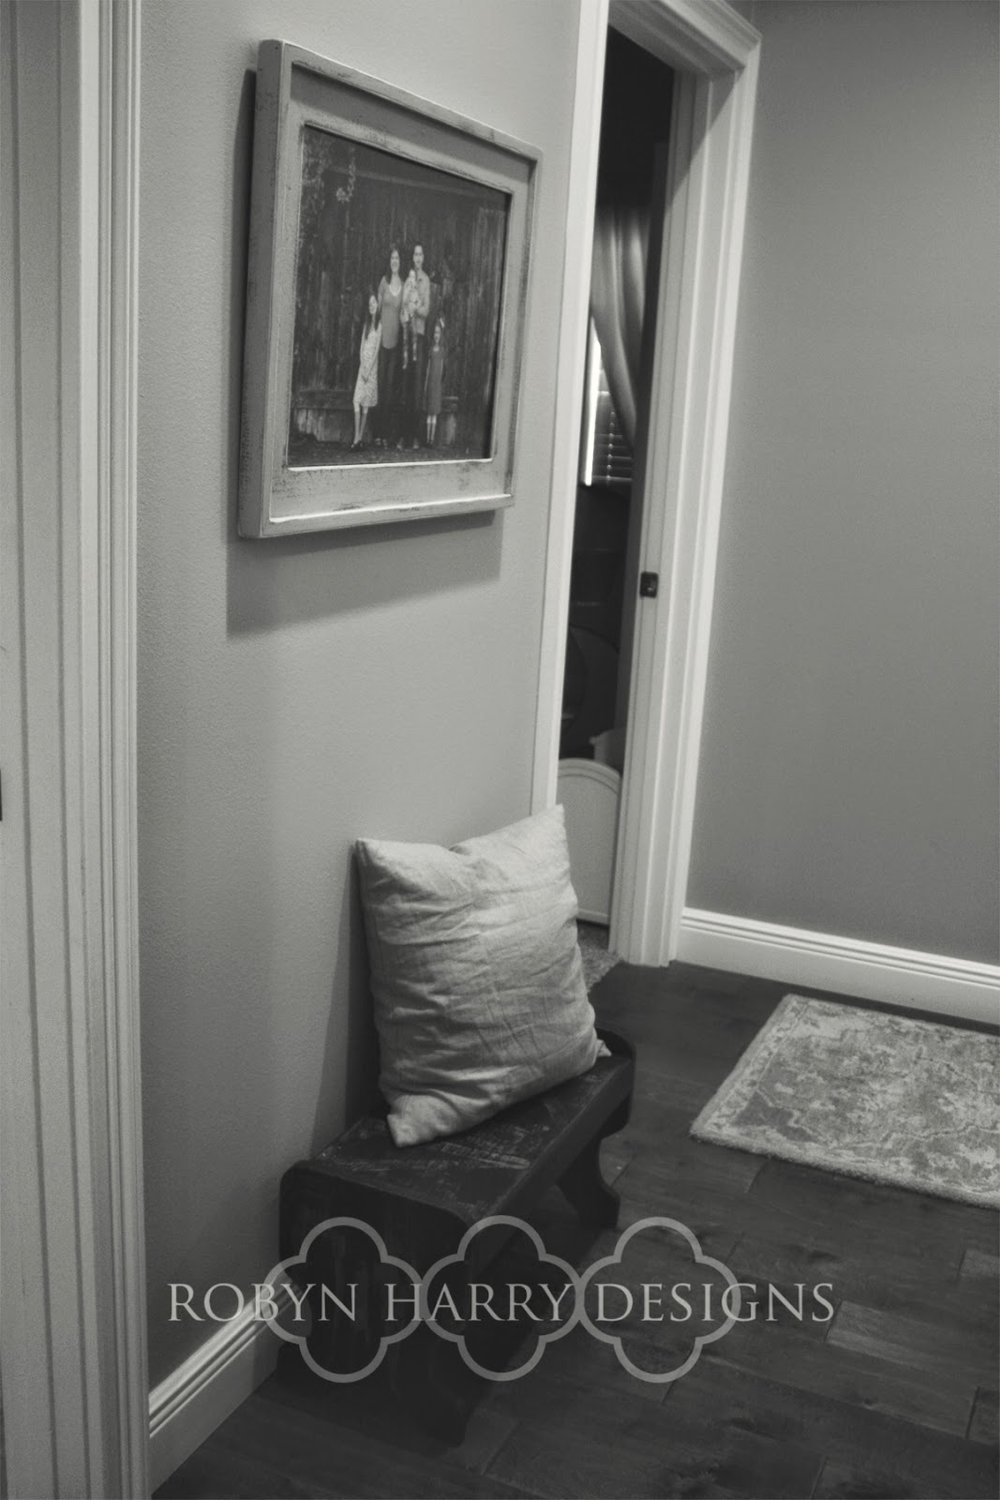
I picked up this stool at a local mission for a super great deal. From the looks of the construction and pieces used, I am guessing it was handmade.
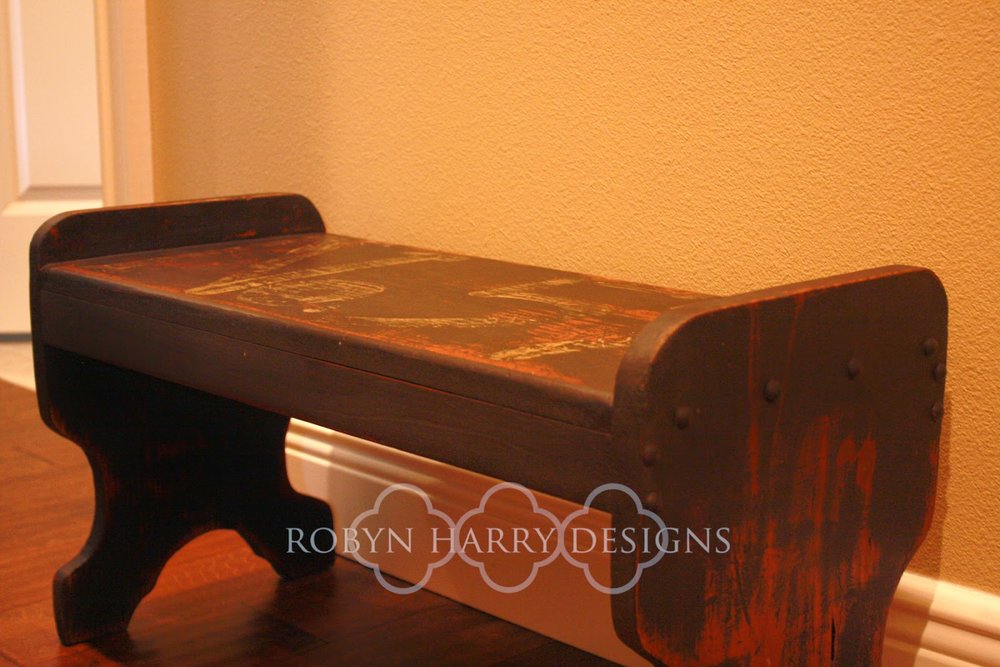
The legs of this stool are very unique. I've never seen anything quite like them.
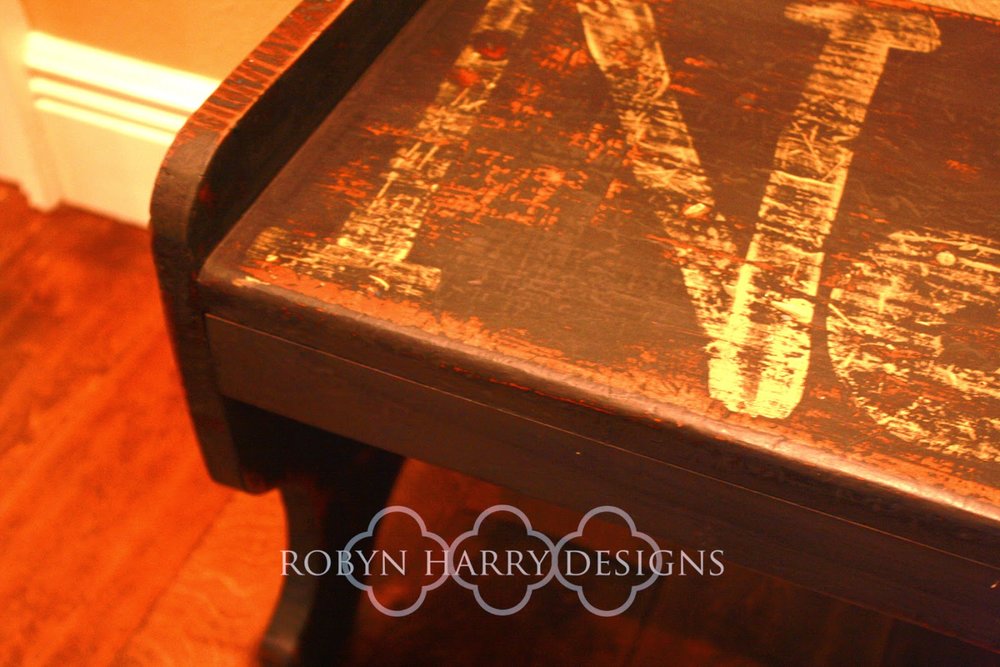
The first step in reviving this gem was giving it a light coat of Miss Mustard Seed's milk paint in typewriter.
Next, I hand painted some simple text on top mimicking a vintage typewriter font I'd found online. I used acrylic paint in gold for this.
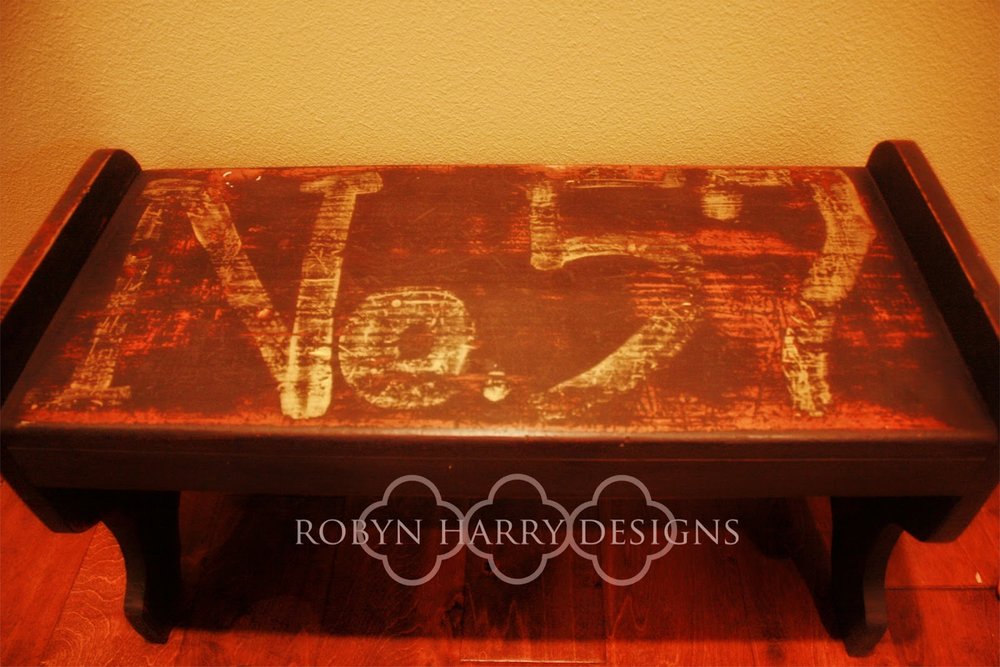
I found the lettering looking too perfect, so I roughed it up quite a bit using a medium grade sandpaper. I also sanded the complete piece using my electric sander and fine grit paper.

I used Miss Mustard Seed's hemp oil on the entire piece to bring out the natural wood and soften the overall look. I love how that wood grain stands out.
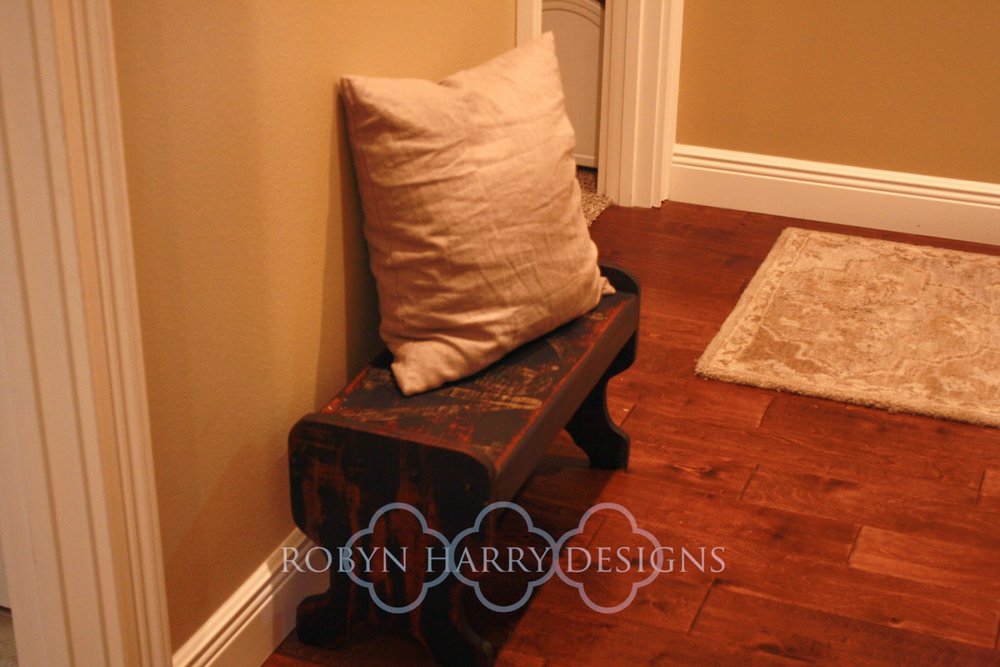
Finally, I completed the piece with one coat of antique wax as well as a single coat of furniture wax. I am pleasantly surprised with how much I ended up liking this piece. I set it up right outside of our laundry room/garage entry and I am thinking it's an excellent place for children to sit and put their shoes on. I also think it would be a great nightstand for an industrial chic bedroom.
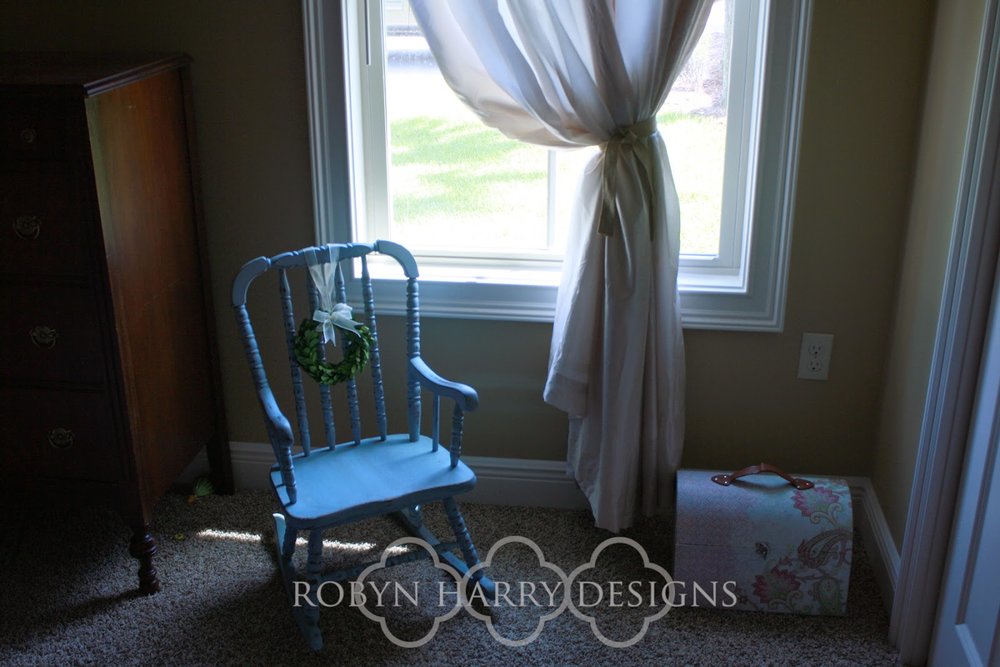
Facelift Friday | Little German Rocker
Today's facelift feature is a fun one. I purchased this sweet little rocking chair from a sweet friend who was downsizing before a move. She told me it was given to her from a neighbor who had purchased it in Germany.
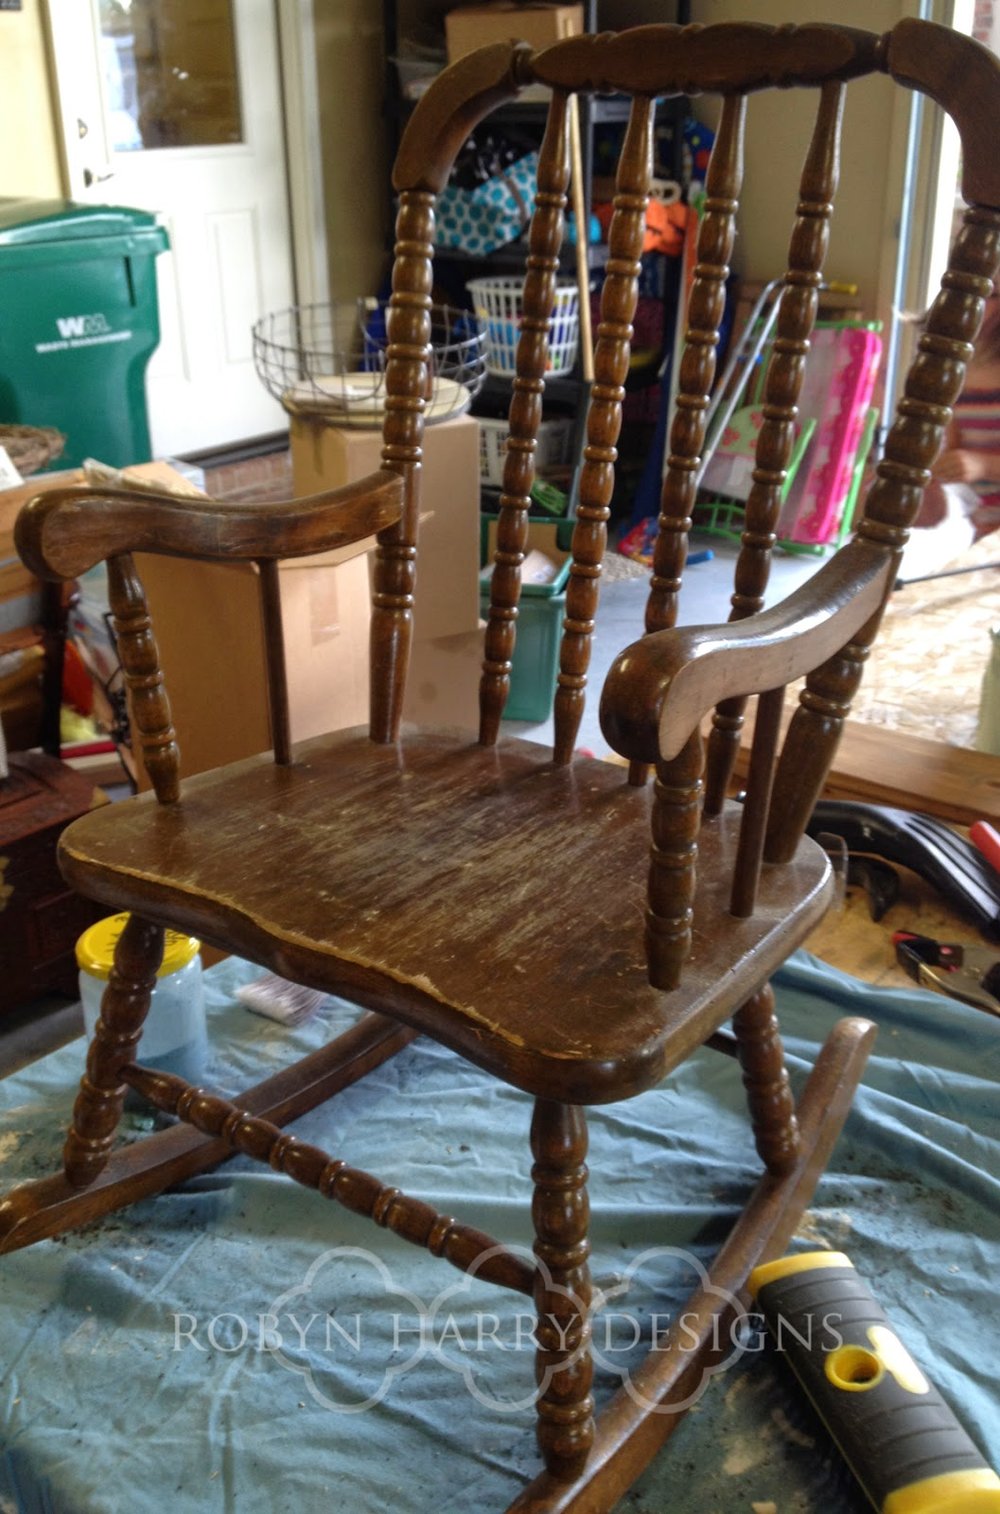

I started with a single coat of Miss Mustard Seed's milk paint in French enamel. It was a little brighter than I'd like and I was also running into bleed through from the previous stain.

Thankfully, I found this post written by Marian addressing such a roadblock. I simply sprayed the entire piece with a clear coat enamel and let it dry overnight. I also added Miss Mustard Seed's bonding agent to the the paint mix.

I now needed to address the brightness of the paint. I simply added more milkpaint in ironstone to the paint I'd previously mixed. It was now the perfect shade of blue.
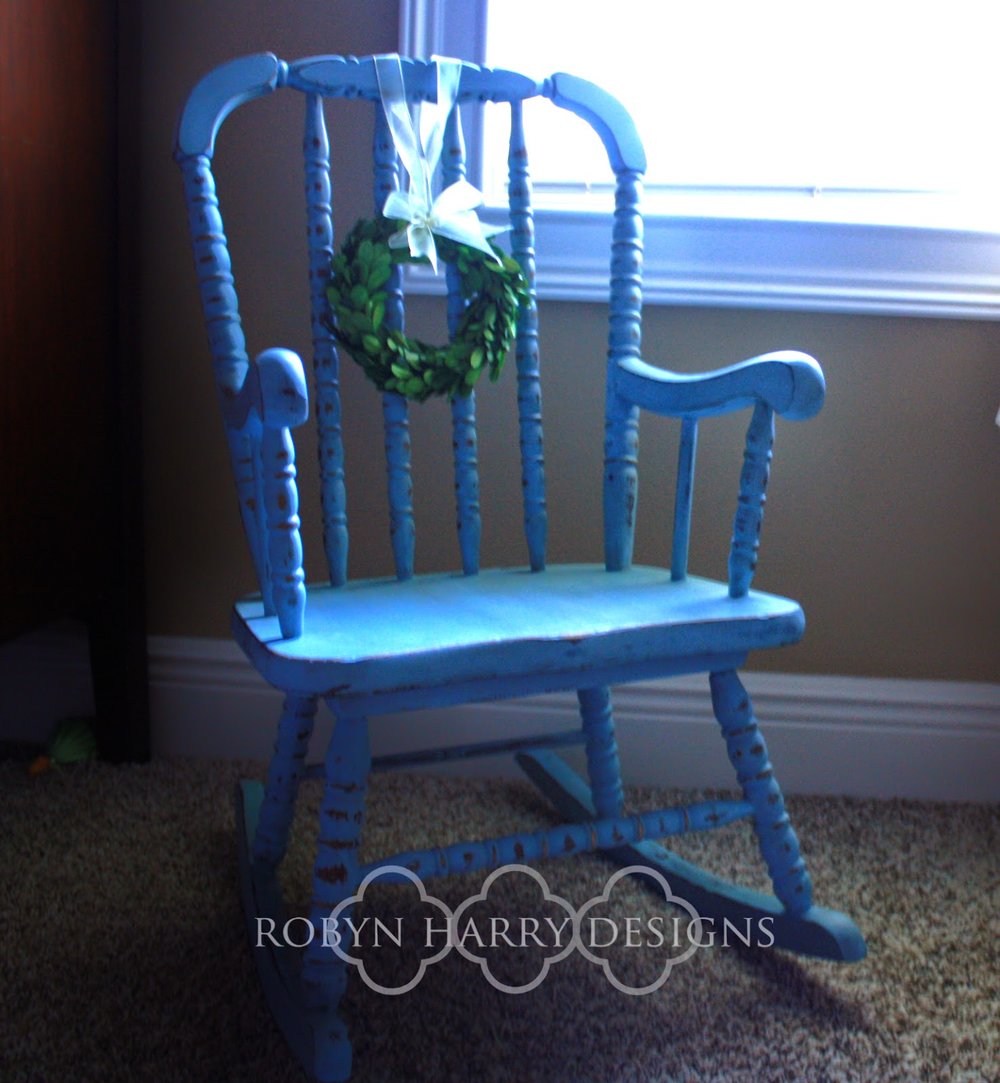
I only ended up using one coat of the french enamel/ironstone mix. I let it dry overnight and when I came back to it, I was not in love. It looked straight out of a 1980's country decor catalog; not quite the look I was going for.
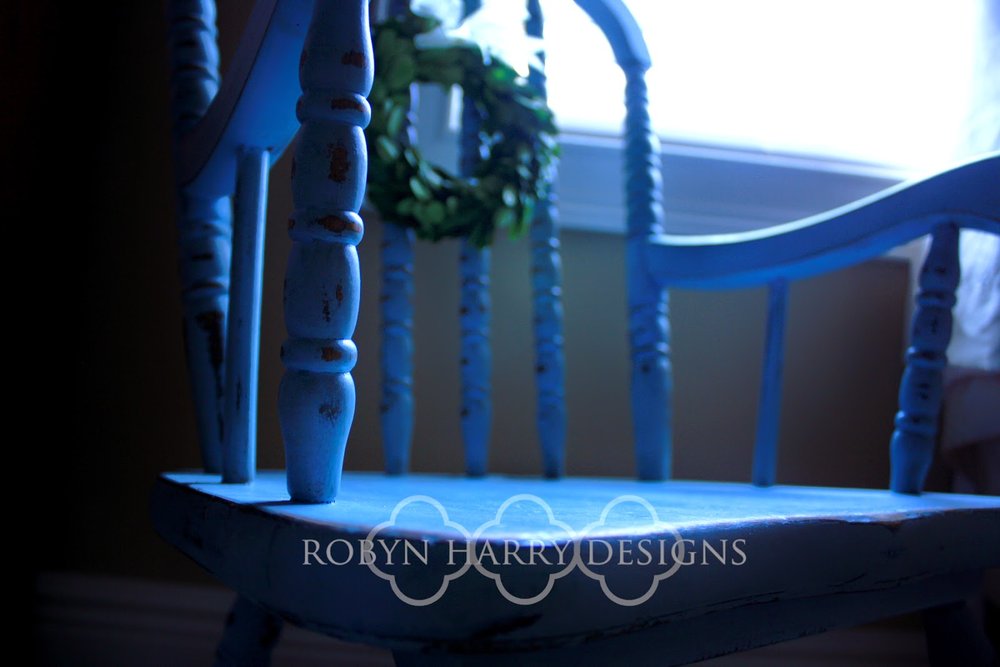
I decided even though it wasn't my style, someone could still love it. I dutifully grabbed my sand paper to smooth down the finish and decided to distress it quite a bit more.
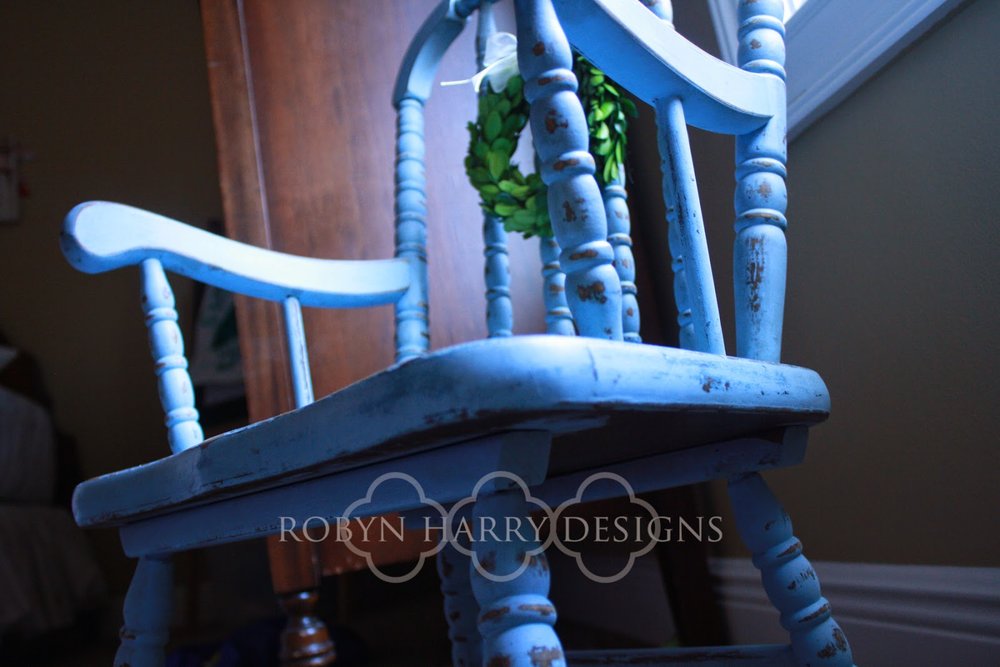
Just look at that chippyness! Now, I was in love.

To further distress it, I used Miss Mustard Seed's antique wax. It dulled the paint just enough and really brought out the chippy distressing.

This little rocking chair turned out so sweet.
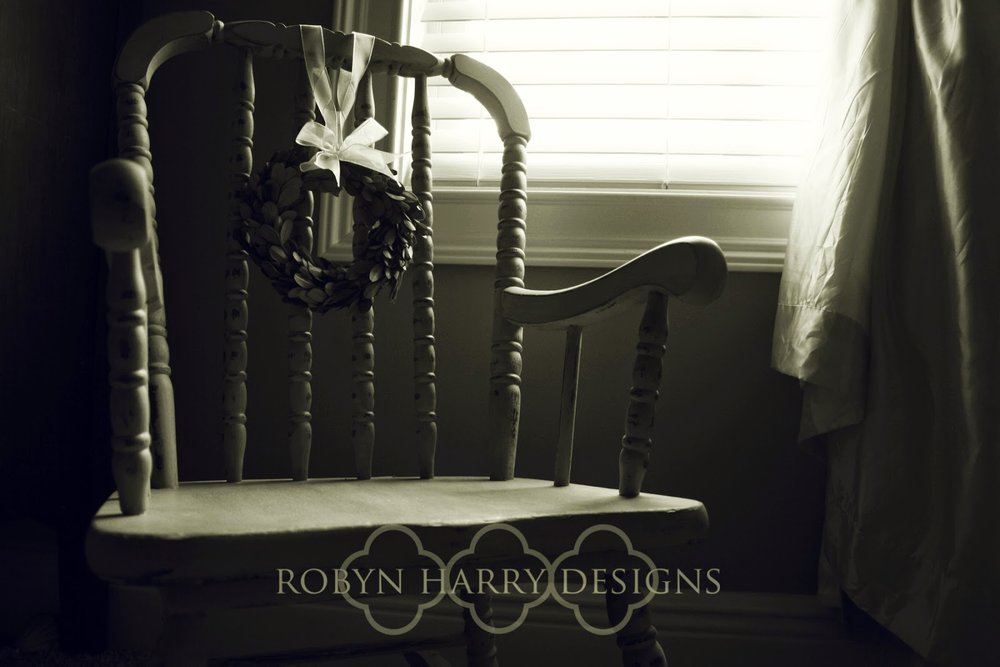
I think it is just the perfect addition to a boy or girl's room. It would even be lovely in a guest bedroom as a side table.

You know, it never ceases to amaze me the difference a little paint and wax can make. I just don't think I will ever get tired of this job.
Room Refresh | Cozying up the living room.
Thank you so much for joining me for the last reveal of this 3 part room refresh! I'm excited to share with you some of the best changes we made.

The biggest challenge many people face when decorating a room is deciding how to dress the windows. This proved especially true in my client's living room. She considered hanging curtains on the windows on either side of the french doors. The problem is the window casings are too close to the door frame. She also considered hanging a curtain on a very (very!) long rod spanning the entire width of the windows and the door. That is definitely a viable option, however I think it would have given the room a more formal feel than my client desired.

Right away you can see the difference window treatments make. The room feels warmer and much more inviting.

Again we used tiebacks in unconventional way. Because of how close the window frame is to the door casing, a standard curtain rod would look out of place. The finials would have to be near nonexistent or they would jut over the door frame. I truly feel the look would have been cluttered and disorganized. In contrast, the treatment we went with looks chic and streamlined. It adds a great frame to the set of windows.

The rest of the changes we made in the living room were small, but had a large impact. The first thing we did was get rid of the shelves behind the sofas. (They are now being utilized in the home office.)

We replaced the shelves with a desk that was not currently being used. I moved one of the lamps to the desk and added a few accent pieces that she already had.

My client wasn't overly in love with her lamps in the living room. I thought they were pretty and fit well with her space. Together, we realized what she didn't love about them were the shades. They are rectangular and she felt they seemed out of place in the middle of the room on the end tables. Moving one of them to the desk and against a wall helped to create a more cohesive look. I suggested she buy a round lamp shade for the lamp that was to remain in the middle of the room.

Finally, we come to the fireplace. This is, without a doubt the focal point of the room.

My client had decide before we met that she was going to have floating shelves installed. Also on her own, she decided to paint the walls behind the shelves in a gorgeous blue. Many of her accent pieces are blues. This is such an inexpensive way to make a large impact on a room. The blue really makes the shelves pop.

Every single thing on those shelves is something my client already owned. It just shows you don't have to invest a lot of money to make your home a haven. Sometimes all you need is a second eye to help you arrange everything in complimentary way.

Above the mantle, we placed an amazing sunburst mirror that my client picked up on her own when we began working together. It's a perfect fit for her style and the space.

On either side of the mirror are simple groupings of beautiful pieces already owned by my client.

One last thing I LOVE to do is to find a large basket to keep blankets in. It adds "something" to a place in the room you feel may be lacking. It's instant coziness and warmth. Both literally and figuratively.

I have immensely enjoyed working with this client. I felt together we came up with perfect solutions for her home. I know she feels more relaxed and at ease in her own space now. I'd even dare to say it is now her haven.
Facelift Friday | A chest of drawers gets a seaside feel.

This was one of my first custom pieces and I thoroughly enjoyed it. I received an email from a client who had been referred by another local business. She had this gorgeous chest of drawers that she wanted painted white and distressed.

I used Annie Sloan Pure White and Miss Mustard Seed's Furniture Wax. I actually prefer Miss Mustard Seed's milk paint, but my client had a bed she wanted to match and it was a PURE white. Miss Mustard Seed's lightest white is still a bit of a cream color and I wanted the dresser to match perfectly.

This chest of drawers is quality construction and solid wood. I really grew to appreciate the amazing details as I painted. I think the white paint with the distressing really highlights the fine detailing that is otherwise sort of lost.

The apron was my absolute favorite part!
My client lives on the beach and this dresser was destined for her guest room. She let me know she had coral drawer pulls she wanted to use, so I removed the original pulls.

She was kind enough to send me these pictures after it was all set up with the custom hardware and decorative accents. I just love how it all turned out! And I must say, she has an excellent sense of style!!

I hope you all have the best weekend!
Excited to share at www.missmustardseed.com
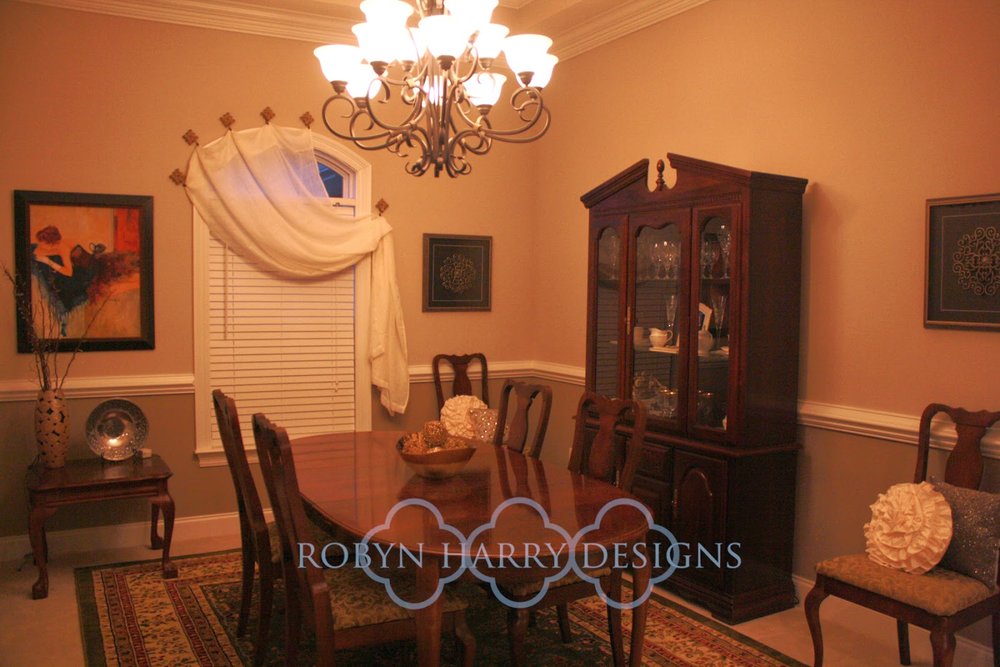
Room Refresh | Better flow in the dining room.
Thanks for joining me again for the before and afters of my first room refresh. Today I will be sharing the changes we made in the dining room. I think the dining room ended up being my favorite of the four spaces we converted. My client loved most everything about her dining room except for the flow of the space.

Because the room is long and a bit narrow, her husband felt angling the hutch in the corner was the best use of space. In fact, it ended up having the opposite effect.

She and I moved the hutch straight against the right wall with the help of these awesome furniture sliders. She was pleasantly surprised with the result. {I hope her husband will be as well!!}

Another tip to create more space is to remove the end chairs from the dining room table. You can store them away until you need them or you can add some lovely pillows and use them as accents in your room.

My client chose the latter and I am so happy she did. I think the result is quite stunning.
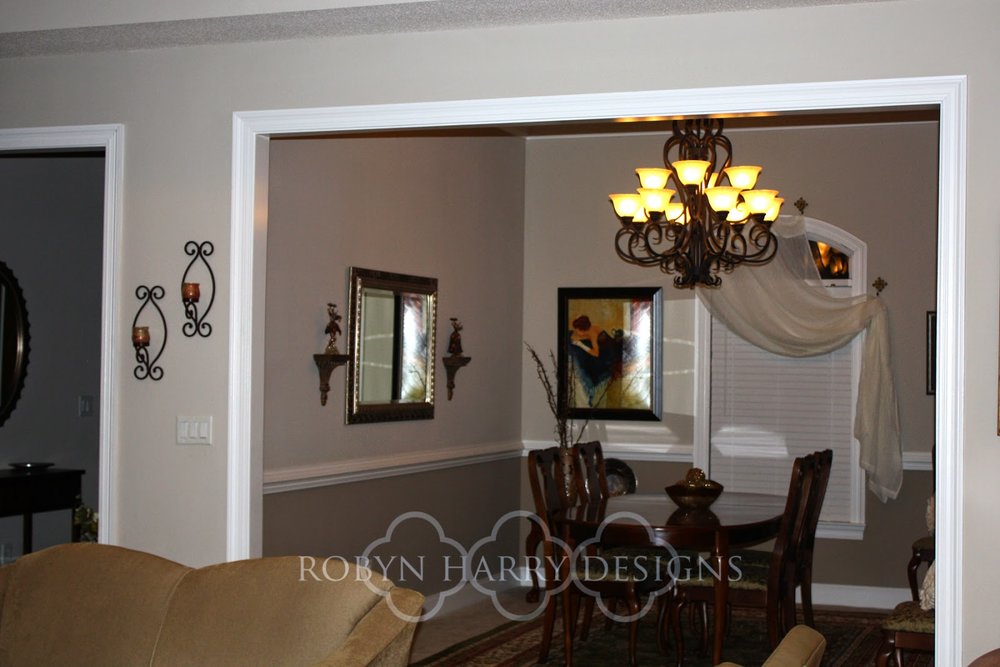
Next, we had only minor changes to make in the dining room. The first thing I thought would improve the feel was to move the Venetian figurines a bit lower and closer to the mirror.

This gorgeous painting is special to my client. Previously, it was centered on one of the long walls and felt lost. We moved it to a smaller wall on the side of the window and I feel it gets the deserved attention in this space.
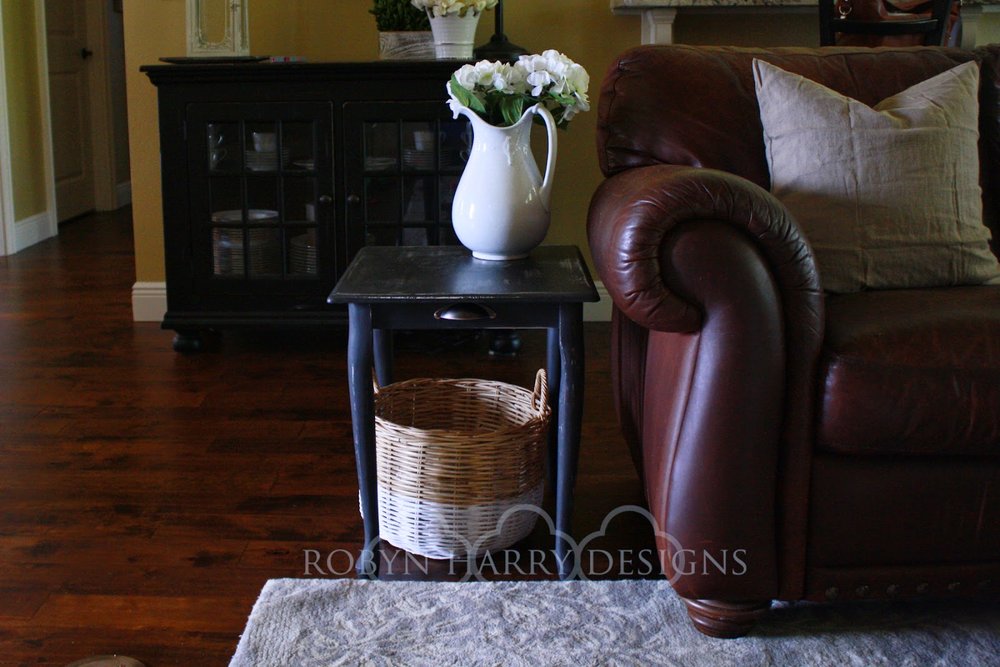
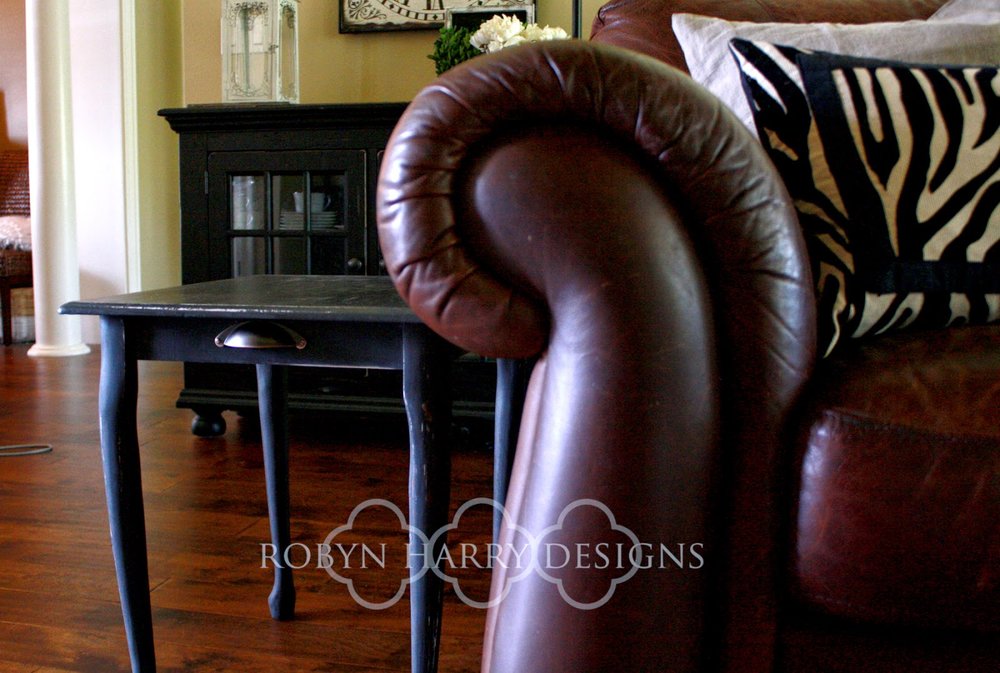
Do you see the cute little Queen Anne table under this painting? It was one of a pair that was acquired by my client's husband prior to their living together. My client felt they were a bit outdated. If you have similar tables and have the same sentiments, a super simple fix is to remove the glass tops. Voila! Easy.

Another common challenge for my clients is window treatments. I would suggest to you to think a bit outside of the box when it comes to this. My client felt her only option was to leave the window as is. I sent her pictures of various treatments for arched windows and she chose this elegant swag.
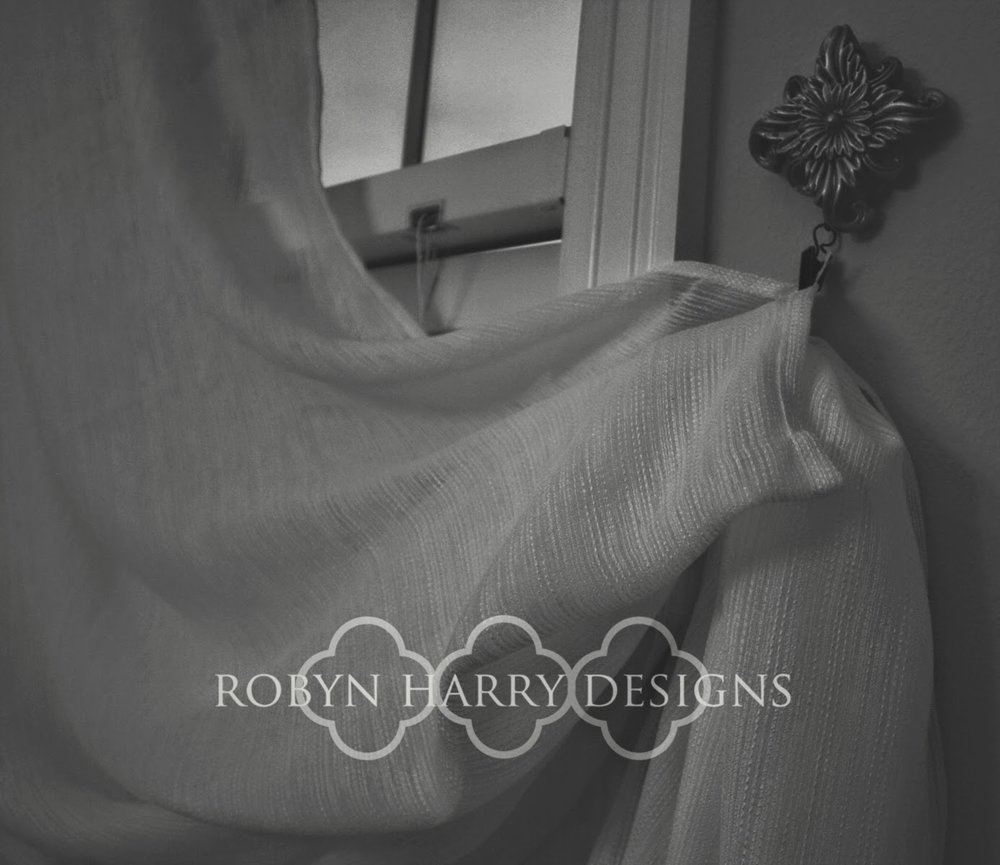
The voile curtain is held in place with the most lovely tiebacks. I simply gave my client the ideas. She purchased exactly what she wanted and installed it herself. In fact, the longer I worked with her, the more confident and independent she became in transforming her home into a haven.
That is exactly what I desire to accomplish when working with my clients. My hope is to empower each of them with the tips and suggestions I give. I want to be able to give them the freedom to add pieces to each room as their schedule and their budget permit.
Room Refresh | Adding pretty to the kitchen.
I am going to try my best to not be too wordy with this post. I know pictures do a great job of speaking for themselves. I recently finished working with one of my first clients. She was an absolute dream to work with as she was willing to go along with all of my crazy ideas without question.

As you can see, she had a beautiful, clean, streamlined kitchen already. She just wanted to add some accents to make it feel a bit more homey.

A great feature of this beautiful kitchen is the cabinets with glass inserts. My client loves them, but felt unsure about how to arrange the contents. Luckily, she has the loveliest set of vintage Noritake china that had once belonged to her grandmother. Because it is something important to her that makes her feel joy, I thought it important to put on display. The set of everyday china was perfect to store in the glass front cabinets. I carefully arranged the dishes for her and she was happy with the result.

The one thing I frequently stress is only keeping things around you that you LOVE. I asked my client if she loved the crystal fruit dish on her island. She liked it, but did not love it for display. She kept it to use functionally, but I assigned her the task of finding a fruit bowl she LOVED. She did a phenomenal job. {Side note - I am now trying to find a similar one in cream for my own home!!}

Something else I asked my client to be on the lookout for were accent pieces for her kitchen. We picked out a few great things on our shopping trip together, but once I helped her define her style, she flew with it! Sometimes all you need is just a tiny bit of guidance.

My client loves the sage green color. Lucky for us both, I had a few things in my stash at home that really suited her style and taste. One of these was the super cute rooster pitcher to the right of the stove. That was the only piece in the picture above that I helped her with. She found the adorable tins on the left and the coordinating pig pitcher on the right completely on her own.

One of my favorite things to do in a kitchen is to put dish soap, hand soap and lotion into pretty soap dispensers. I then like to place the dispensers on a pretty dish or tray. The result is one of my favorite features in her kitchen. It's so silly, I know, but grouping things together like she did above has such a big impact! The tray she used is a bread plate she already had on hand. She purchased two coordinating soap dispensers for her hand soap and dish soap and then added a matching candle. The tray serves dual purpose. It contains the like items in a pretty display AND it catches the small drips of soap and water that are bound to occur on a daily basis.

Another one of my favorite kitchen tips is pretty storage for your single use coffee cups. My client really liked this idea as well. We found this gorgeous carved wood box on our trip together. It fits seamlessly with the rest of her kitchen style and it hides a good number of those all important coffee cups.

One final side by side comparison of her awesome kitchen. As you can see, there really wasn't a ton to do in the kitchen. It was fun to add just a few super pretty accent pieces and storage. Join me later this week as I share her living area and dining room!
Facelift Friday
Giving new life to a mass produced end table.
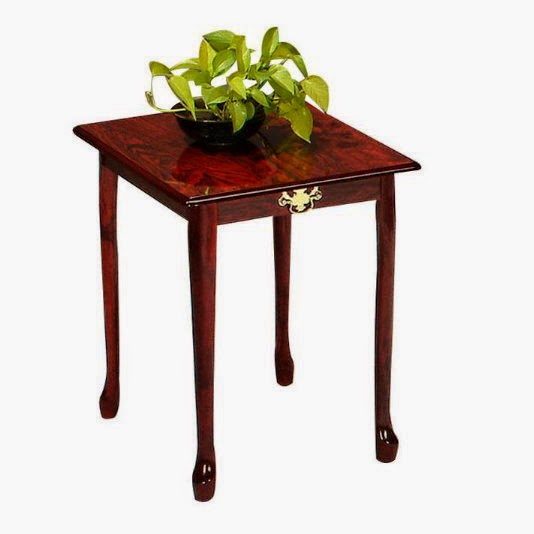
I recently picked up a run of the mill end table much like this one:
It was super cheap and I'm sure it is hardly solid wood. But everything in this life deserves a second chance, right? I like the idea of rescuing pieces that most wouldn't give another thought to.

For the first coat of paint, I used a homemade chalk paint in an antique white. I wasn't entirely sure the direction I'd be headed with this piece.
The second and third coats of paint are Miss Mustard Seed's Milk Paint in Typewriter. I am in love with the soft charcoal pigment of this paint.

I knew right away I'd want a damask on the top. I found a pretty image at www.thegraphicsfairy.com, but it was a little taller and thinner than I prefered. A simple manipulation in PSE fixed that.

I painted the damask with a very dark grey latex paint in hopes that it would withstand a heavy amount of sanding. It worked. I sanded quite a bit on the top of the table so the antique white would come through.
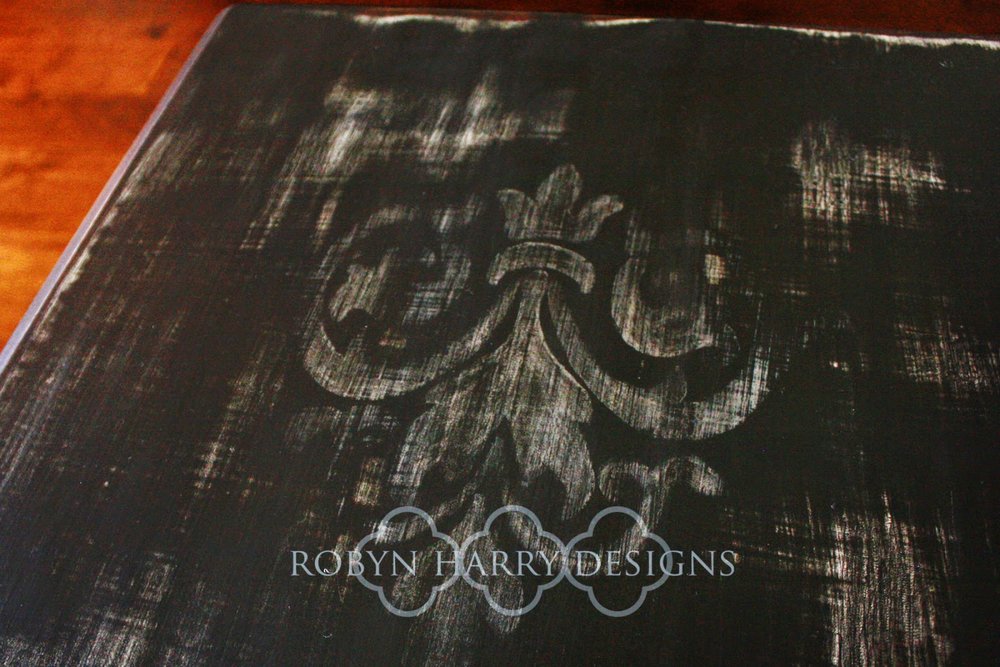
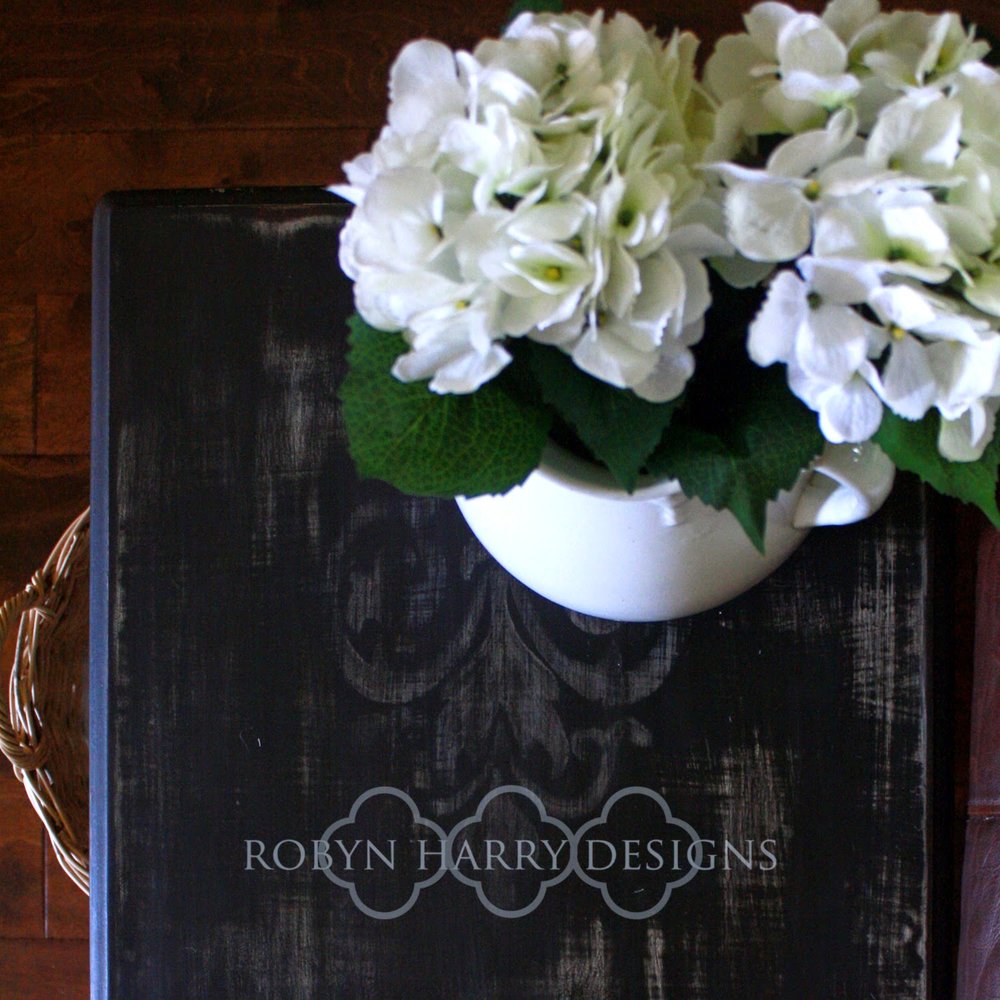
The result is a beautiful image that looks as if it has survived many years of love and wear.
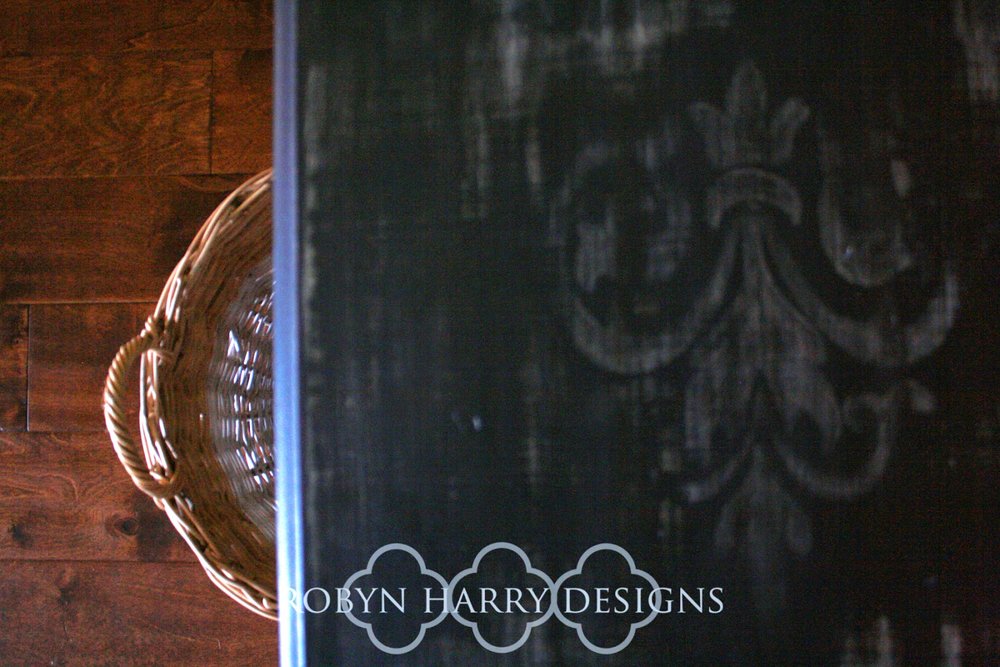
The final step to complete this table was new hardware. An antique bronze cup pull was just perfect.

The final result is just lovely. I hope you are inspired to breathe new life into something this weekend!
sharing at MMS Milkpaint Masterpiece Monday
Okay, you've hired me....
Now what?
I know the thought of hiring an interior designer is foreign. Let's face it, it's probably a bit intimidating as well. What can you expect from me as a designer? In order to clear the mystery and hopefully lessen your apprehension, I am going to lay it ALL out there for you in one single post.
The common perception of interior design goes something like this:
- designer comes for consultation
- designer presents ideas for space
- client accepts ideas or moves back to step 1. with a different designer
- client suggests small changes in fabrics, textures, paint colors, etc.
- designer purchases all new furniture, window treatments, decorative accessories, etc
- designer hires several subcontractors to implement all structural changes suggested & approved
- client is scarcely involved in the process
It may actually work like that for a large amount of interior design clientele. My workflow is a little bit different. Throughout the entire process, my clients hold the steering wheel. I am simply the navigator. I can be involved in as much or as little of the transformation as you desire.
This is how it works when you hire me as your designer:
ROOM REFRESH {$50 per space, max 2 hours time}
- we arrange a time to meet at the space you'd like to transform
- we discuss your goals and/or vision for the space
- I give you suggestions, tips and guidance to achieve said goals
- I give you a very detailed list of suggested purchases and changes to make to your space
- If necessary, I help you rearrange to create better flow for more comfort
- Together, we "shop" the rest of your home for items that may fit better in this specific space
- If additional purchases are needed, I give you an exhaustive list of local and national sources for home decor
- I email you a streamlined list of agreed upon changes & purchases
- YOU do the shopping, make the purchases, complete the changes and transform your space with the guidance I've given you. You do this on YOUR budget and YOUR timeline.
- We meet once more to tie up any loose ends
If you are confident in making the purchases we have discussed, and are satisfied with the changes we have made, this is where our time together ends. This is the easiest, most economical option that I offer.
PERSONAL SHOPPING {$20 per hour}
Okay, we've agreed on the changes that need to be made and we've rearranged your living room. There are some spaces that still need a few cute accent pieces and we've decided to buy a new table for your foyer. You have a picture in your mind of how you want your living area to look and feel, but you don't feel sure of your ability to make that leap from your vision to reality. That is where personal shopping comes in.
There are two options I offer for personal shopping:
1. I accompany you on your shopping excursion and we make the purchases together.
2. I do the shopping on my own while you go about your daily activities and commitments. I will stay within the predetermined budget. {this is also a great option for those who simply do not have the time to shop for themselves}
After the desired purchases have been made, it is up to you to arrange the items based on the guidelines previously provided by me. If you feel you still need assistance, I offer an additional decorating service.
MISCELLANEOUS DESIGN SERVICES {$20 per hour}
This is where all the extras fall. Some examples:
1. Shelf styling
2. Arranging vignettes
3. Painting furniture
4. Room painting
5. Floral arrangements {real & faux}
6. Wreath making
7. Room rearranging
8. Custom window treatments
9. Gallery walls
If you are completely happy with everything in your home, but just need a discerning eye to arrange your mantle, this service is for you.
So, there you have it. Pretty easy and straight forward, no? Let me help you create your haven. Contact me today!!!
Interior Design for the Rest of Us
When you hear "Interior Design" what comes to mind? Long before I started studying to become a designer, I envisioned it being a service only the elite, upper class could afford. You know, like the Vanderbilts.
 |
| source |
Also, celebrities, professional athletes and the like.
 |
| Drew Barrymore's dreamy foyer |
Maybe that's not quite what comes to mind. Maybe you're just thinking of "those" people across town. You know the ones. They drive the "it" vehicle, have all the latest and greatest, and dress to the nines. Yes, they probably hire interior designers as well.
 |
| Don't worry, this is only a vacation home. |
Interior design is often thought of as a luxury. Something that would be nice to have, but costs quite a bit. I'd like to challenge you to view interior design differently; perhaps as a necessity. I know that sounds far fetched, but bear with me.
Our homes are the root of our entire lives. They are also the root of our spouse's life and the lives of our children. Everything we do, all that we are stems from our home. Consider this statement from a recent article regarding clutter and your mind, "Living in a cluttered home can create subtle, constant, low-grade stress. Anxiety over clutter messes with your brain’s alpha waves and interferes with your sleep, making you more fatigued, impacting your hormone levels, and increasing production of cortisol. The more clutter, the more overwhelming the thought of removing it becomes, leading to greater stress, overwhelming fatigue, and depression." {source}
I know you are now probably wondering how clutter relates to interior design. If clutter can have such a negative impact on your brain, imagine what a well organized, beautiful space can do for you and your productivity. Having a beautiful home is more than having a beautiful home. It's having a haven for you and your family. It is having a safe place to fall; a place of rest and rejuvenation. A haven is the protective nest you provide for your family and yourself. It is where your heart resides. Treat it with care and respect.
I know you are now probably wondering how clutter relates to interior design. If clutter can have such a negative impact on your brain, imagine what a well organized, beautiful space can do for you and your productivity. Having a beautiful home is more than having a beautiful home. It's having a haven for you and your family. It is having a safe place to fall; a place of rest and rejuvenation. A haven is the protective nest you provide for your family and yourself. It is where your heart resides. Treat it with care and respect.