Paper Play | Preppy vs. Shabby
This morning our family was very focused and ambitious, so I had some extra time to play with paper. It's something I love, but don't get to do often. However, I do teach two stamping classes a month, so I do have to get my projects done.

This card was totally inspired by Kimberly Van Diepen. (You can see her original here. I nearly copied every aspect of it!) I loved the use of the Island Indigo quatrefoil paper on the Crumb Cake base, but wanted to play around with the colors.

I added a strip of Wild Wasabi card stock on the bottom and immediately got a preppy vibe. I stamped the sentiment in Night of Navy, added the 1/2 inch strip of Wisteria Wonder at the bottom. Although my initial goal was to create a beautiful shabby card like Kimberly's, I loved the clean, crisp look. I still felt it needed a little something. What better than pearls? 4 tiny pearl accents in the corners of the Wisteria Wonder strip were perfect.

After finishing my preppy card, I wanted to make a similar card, but with a shabby feel. This is where I added embellishments like Kimberly's. I also "distressed" every piece of card stock and paper with Soft Suede ink in contrast to the clean look of the first card.

It's hard to say which is my favorite. But I love that the entire feel of a card can be changed with a sponge, ink and a few minimal embellishments.
Here they are side by side for comparison.

What are you doing today to get creative?
Valentine Banners + A Ribbon Rosette Tutorial
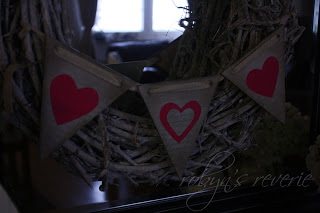

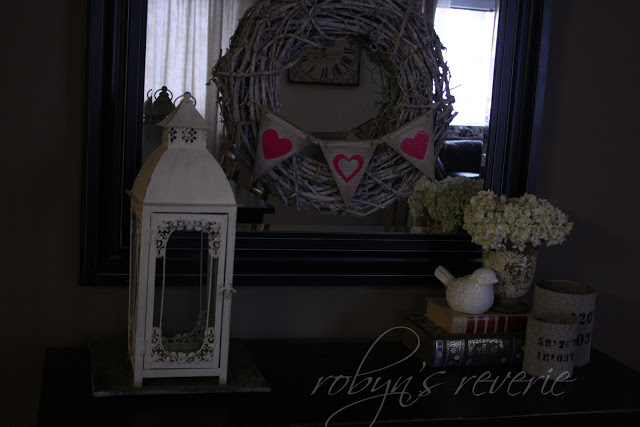

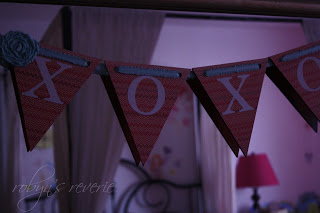

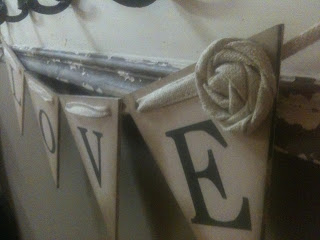
These lovely banners were sold for a limited time in my etsy shoppe this year for Valentine's Day. On each banner, I featured a delicate ribbon rosette. I thought I'd share a very amateur tutorial on how to make these sweet little rosettes.
You will need ribbon, double sided adhesive and a piece of cardstock.
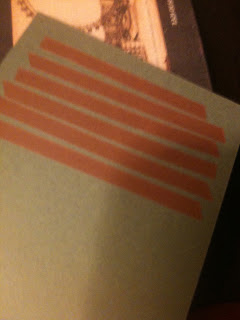
1. Start by lining the piece of cardstock with double sided adhesive. Make the sticky space large enough to accommodate the desired size of your rosette.
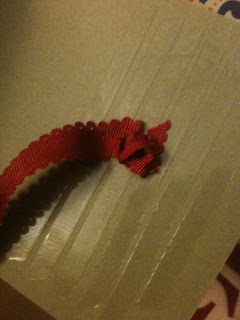
2. Tie a knot at the end of your ribbon. This will be the center of your rosette.

3. Start twisting and wrapping. As you twist the ribbon, wrap it continuously around the knotted center.
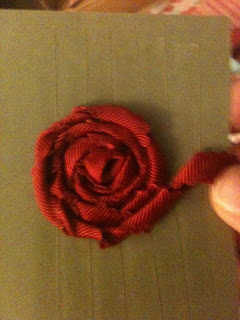
4. Keep twisting and wrapping until your rosette is the size you desire.

5. Trim the ribbon and tuck the end under the completed rosette.
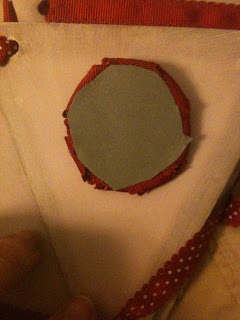
6. Trim away all the excess cardstock until you can no longer see it from the front. You will place your adhesive on the cardstock backing of the rosette. It is now ready for your project!
Happy to be sharing at Feathered Nest Friday on French Country Cottage!
Gratitude Tea Bag Holder
November is my absolute favorite month. Although fall officially begins in September, the weather seems to take a more dramatic turn towards autumn in late October, early November. My wedding anniversary is in November, as well as my favorite holiday. I love Thanksgiving because it seems to be one of the last holidays to be heavily influenced by commercialism. Now, I know Black Friday is commercialism at it's finest, but for that one day, it's all about gratitude and family.... and pumpkin pie.

Once assembled, I added a strip of Orchard Harvest designer series paper on top of a strip of taffeta ribbon. I stamped the sentiment on ivory naturals cardstock and punched it out with my decorative label punch. On the inside, I added a simple acorn stamp punched out with the small oval punch.
This simple project takes no time at all to put together and is a perfect little Thanksgiving gift for friends, family, teachers and of course your lovely hostess for Thanksgiving dinner!
Products Used (These can be purchased 24/7 at my Stampin' Up site by clicking on the item.)
Cardstock & Paper
Naturals Ivory Card Stock
Cajun Craze Card Stock
Orchard Harvest Designer Series Paper
Stamps & Ink
Day of Gratitude Stamp Set
Soft Suede Classic Ink
Embellisments
Linen Thread
Early Espresso 1/8" Taffeta Ribbon
Cardstock & Paper
Naturals Ivory Card Stock
Cajun Craze Card Stock
Orchard Harvest Designer Series Paper
Stamps & Ink
Day of Gratitude Stamp Set
Soft Suede Classic Ink
Embellisments
Linen Thread
Early Espresso 1/8" Taffeta Ribbon
A Matter of Moments
I've had some people ask recently if I am still paper crafting. The answer is a resounding yes. I've actually been quite busy with Stampin' Up groups and scrapbooking projects. I guess what has happened is I've been so busy getting things done, I just don't photograph and post them. I've also shifted my focus onto home decor and organization. That is where my heart truly lies. However, I am still in love with paper crafting and I do hope to share a few projects from time to time.
Tomorrow I am meeting with my fabulous rotating hostess group, so I have been spending some time today getting our projects ready. Spring is definitely in the air around here and I definitely let the weather influence my crafting.
Here is one of the cards we will be making tomorrow.


Tomorrow I am meeting with my fabulous rotating hostess group, so I have been spending some time today getting our projects ready. Spring is definitely in the air around here and I definitely let the weather influence my crafting.
Here is one of the cards we will be making tomorrow.
Products used on this card:
PAPER
Wisteria Wonder Smooth Card Stock
Lucky Limemade Smooth Card Stock
STAMPS
INK
Soft Suede Classic Stampin Pad {for distressing}
ACCESSORIES
TOOLS & ADHESIVE
Stampin Sponges {for distressing}