The ABCs of Decorating | C

I know, I know. You came here looking for some kind of awesome secret on home decor and cleaning was the last thing you wanted to do. I'm sorry, but today is just good ol' sage wisdom. You will never, ever, EVER love your house when it is a mess. That may be harsh, but it's the truth. We all have goals we want to meet where home decor is concerned. The very first step is starting with a clean slate..... which is equal to a clean home.
I'm not going to elaborate on the need for organization and cleanliness. I did a short series on decluttering here. I also wrote a post with some simple tips for clutter control. I realize C is not for "clutter-free," but let's face facts: it's much easier to keep a clean house with less clutter!
Here are a few basic things our family does to keep my home clean on a regular basis. It's not perfect by any means, but it's mostly picked up and presentable on any given day. I think the things on this list are quick and easy enough for any family member to do, even the three year old.
1. Run the dishwasher nightly & unload in the morning. That way, you are never short dishes during the day and you have an empty dishwasher awaiting the items you've used throughout the day. My children are usually responsible for the unloading in the morning.
2. Do at least one load of laundry a day. See it through to the folding and putting away. I confess I have not kept up with this the last few weeks and I really do feel the weight of it.
3. Put things away immediately after using them. This is something that does not come natural to me (or my children!), but it makes the world of a difference. If you think about it, a really messy room is just a whole lot of little things that did not get put away after being used.
4. Clean the kitchen as you cook. There are always spare minutes while cooking. Use that short amount of time to wash a pot, put measuring spoons in the dishwasher, etc. That way, when dinner is done, you only have to rinse plates and pack up leftovers.
5. Don't step over it, pick it up! I really need to work on training my children to do this because they are master dodgers. We are all guilty of saying, "I'll get it later." Instead of later, do it now. Again, the little things are what adds up to a giant mess.
Hopefully these little tips help you to maintain a mostly clean home most of the time. If you have any you would like to add, please do so in the comments or on my facebook page. I'd love to hear them!

The ABCs of Decorating | B

The basics are going to be different for every person. For me, it's pretty simple. I guess that's why they are called basic. When you find yourself wanting to change up your home decor or just add any at all, this is where I would start hands down. You don't have to spend a lot of money at all when it comes to the basics. In fact, several of my basic items were purchased at big box discount stores. So, let's get to it, shall we?
1. Window Treatments | These are a must when it comes to home decor. I feel like a room without some sort of dressing on the window just feels naked. Notice I did not specifically say "curtains." Every home is different, every room has it's own vibe. Follow that feeling and add a covering to your window that accentuates the overall ambiance of a room. Of course there are many window coverings to choose from, but that is another post entirely.

2. Mood Lighting | This is so, SO important. If you were to come to my home right this instant, you'd see I have THREE (3!!!) lamps in our family room alone. We have at least one lamp in every room of our home, even in a bathroom. There are a few times when overhead lighting is important; when you are sewing, cooking, or performing surgery, perhaps. Other than those times when bright, clear light is needed, lamps provide plenty of necessary lighting. You can use several to provide a variety of options for a specific room. Lamps are an accessory in themselves, but when turned on, they provide a whole new level of warmth and coziness. Trust me on this one and try it. You will truly be amazed at the difference lamps make.

3. Rugs | This last basic is going to vary widely depending on the type of flooring you have. Of course if you have wood or tile floors, you will want a large area rug to provide comfort above all else. Rugs anchor a space. They visually hold all of your room together by giving your eye somewhere to settle. They are also wonderful in unexpected places, such as under the table in your kitchen. Not only does it provide a softness to an otherwise sterile place, it is excellent for sound absorption.

So, there are my basics when it comes to home decor. You can find most of these things fairly inexpensively and very easily. What are the basics of your home decor?

Room Refresh | Better flow in the dining room.
Thanks for joining me again for the before and afters of my first room refresh. Today I will be sharing the changes we made in the dining room. I think the dining room ended up being my favorite of the four spaces we converted. My client loved most everything about her dining room except for the flow of the space.

Because the room is long and a bit narrow, her husband felt angling the hutch in the corner was the best use of space. In fact, it ended up having the opposite effect.

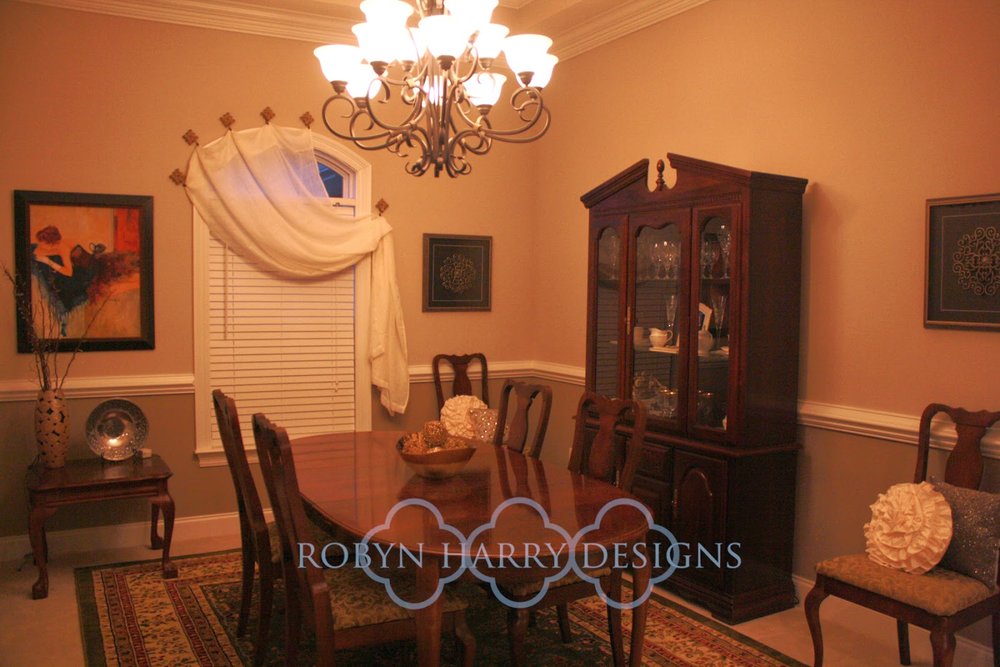
She and I moved the hutch straight against the right wall with the help of these awesome furniture sliders. She was pleasantly surprised with the result. {I hope her husband will be as well!!}

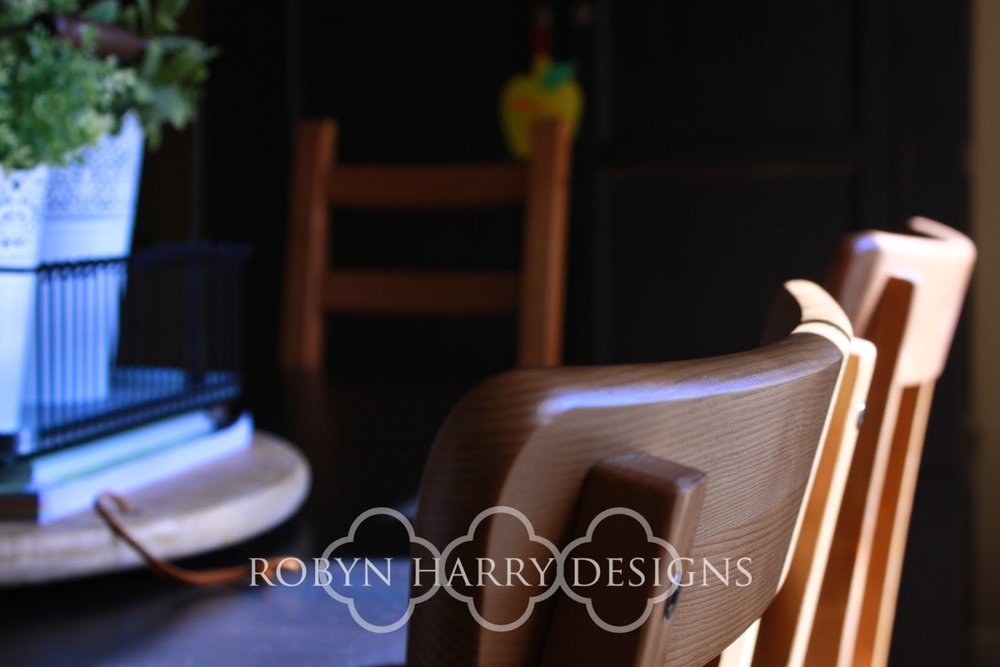
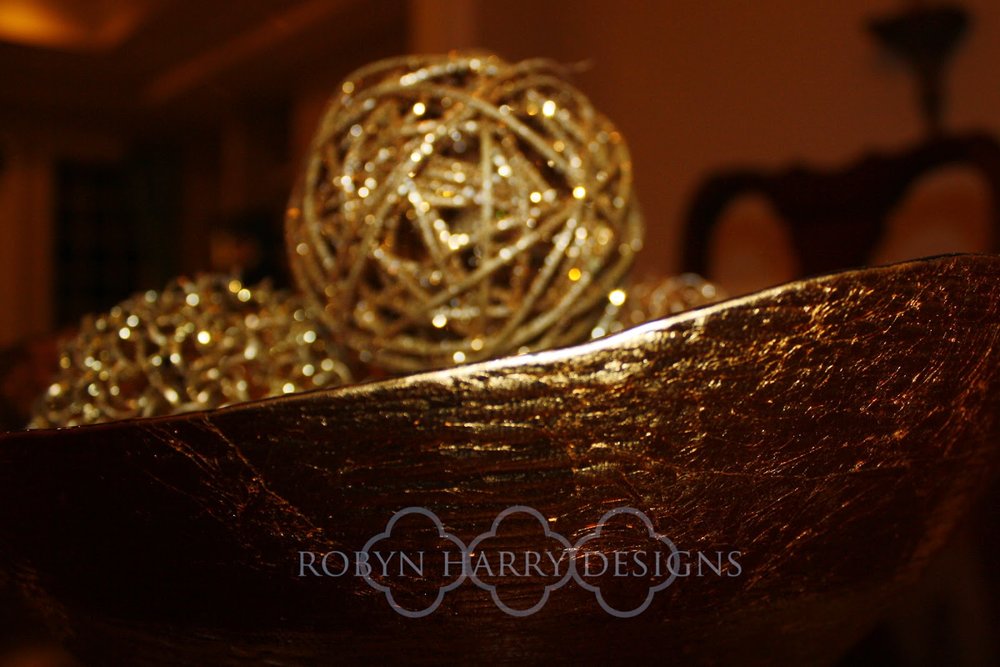
Another tip to create more space is to remove the end chairs from the dining room table. You can store them away until you need them or you can add some lovely pillows and use them as accents in your room.

My client chose the latter and I am so happy she did. I think the result is quite stunning.
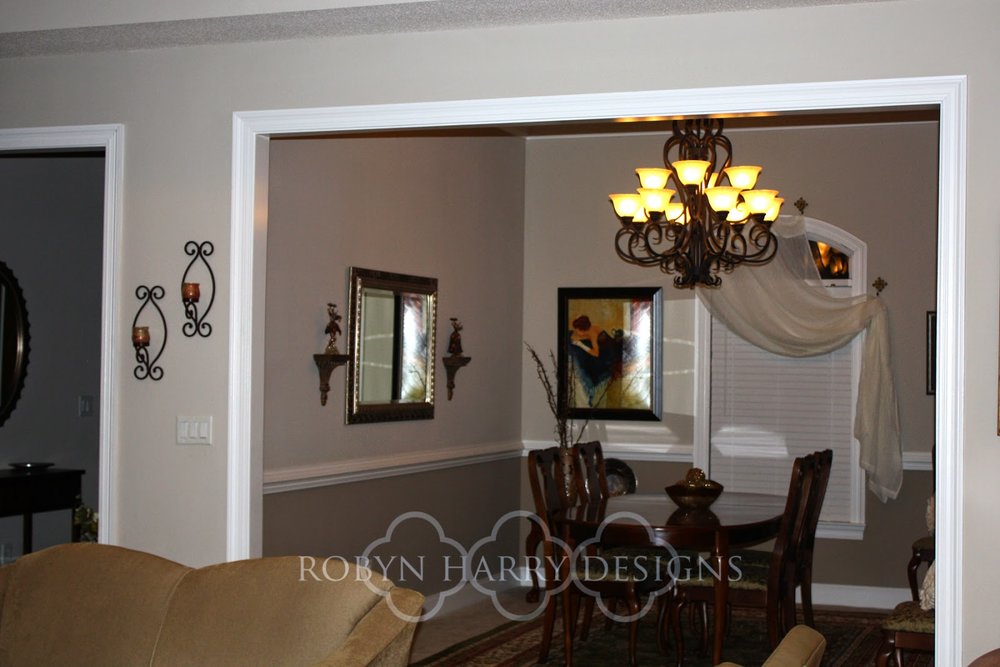
Next, we had only minor changes to make in the dining room. The first thing I thought would improve the feel was to move the Venetian figurines a bit lower and closer to the mirror.

This gorgeous painting is special to my client. Previously, it was centered on one of the long walls and felt lost. We moved it to a smaller wall on the side of the window and I feel it gets the deserved attention in this space.
Do you see the cute little Queen Anne table under this painting? It was one of a pair that was acquired by my client's husband prior to their living together. My client felt they were a bit outdated. If you have similar tables and have the same sentiments, a super simple fix is to remove the glass tops. Voila! Easy.

Another common challenge for my clients is window treatments. I would suggest to you to think a bit outside of the box when it comes to this. My client felt her only option was to leave the window as is. I sent her pictures of various treatments for arched windows and she chose this elegant swag.
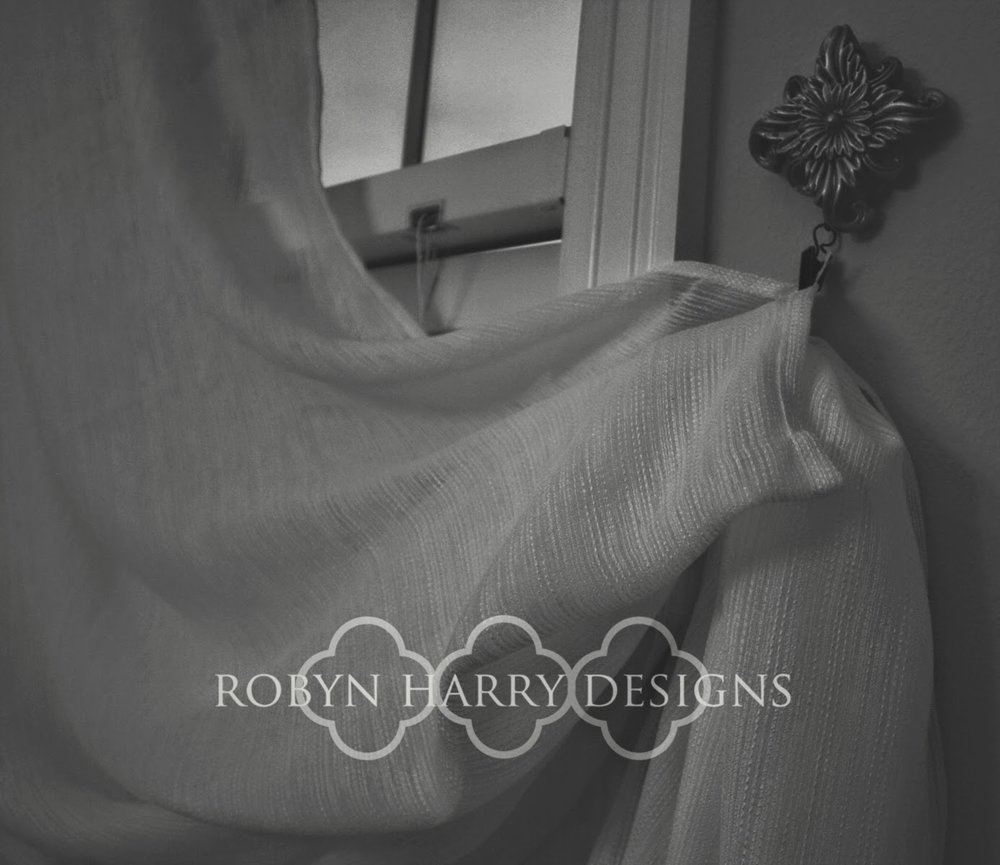
The voile curtain is held in place with the most lovely tiebacks. I simply gave my client the ideas. She purchased exactly what she wanted and installed it herself. In fact, the longer I worked with her, the more confident and independent she became in transforming her home into a haven.
That is exactly what I desire to accomplish when working with my clients. My hope is to empower each of them with the tips and suggestions I give. I want to be able to give them the freedom to add pieces to each room as their schedule and their budget permit.
Room Refresh | Adding pretty to the kitchen.
I am going to try my best to not be too wordy with this post. I know pictures do a great job of speaking for themselves. I recently finished working with one of my first clients. She was an absolute dream to work with as she was willing to go along with all of my crazy ideas without question.

As you can see, she had a beautiful, clean, streamlined kitchen already. She just wanted to add some accents to make it feel a bit more homey.

A great feature of this beautiful kitchen is the cabinets with glass inserts. My client loves them, but felt unsure about how to arrange the contents. Luckily, she has the loveliest set of vintage Noritake china that had once belonged to her grandmother. Because it is something important to her that makes her feel joy, I thought it important to put on display. The set of everyday china was perfect to store in the glass front cabinets. I carefully arranged the dishes for her and she was happy with the result.

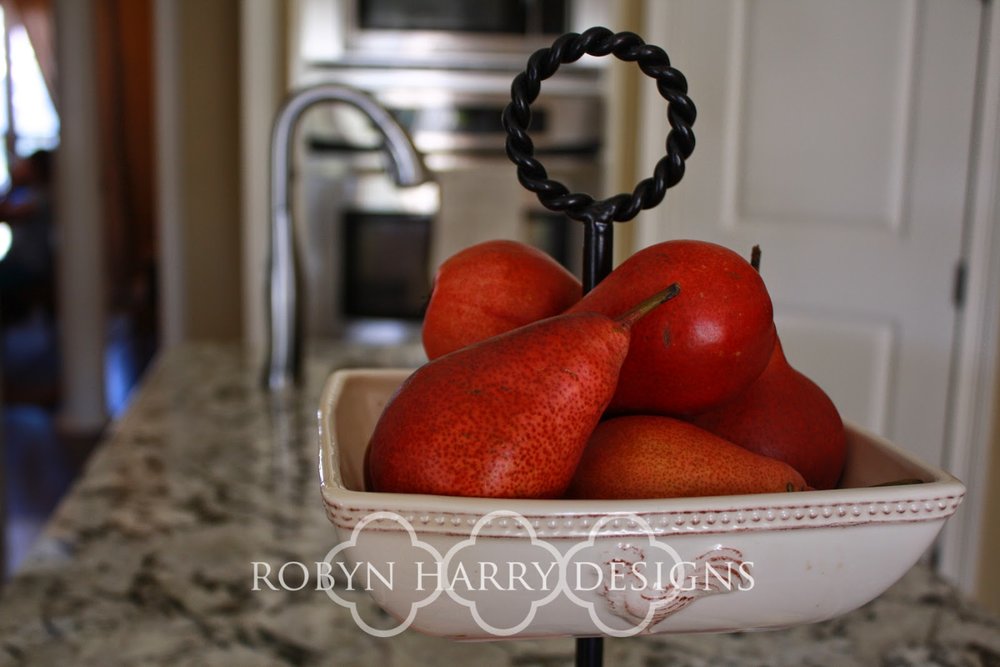
The one thing I frequently stress is only keeping things around you that you LOVE. I asked my client if she loved the crystal fruit dish on her island. She liked it, but did not love it for display. She kept it to use functionally, but I assigned her the task of finding a fruit bowl she LOVED. She did a phenomenal job. {Side note - I am now trying to find a similar one in cream for my own home!!}

Something else I asked my client to be on the lookout for were accent pieces for her kitchen. We picked out a few great things on our shopping trip together, but once I helped her define her style, she flew with it! Sometimes all you need is just a tiny bit of guidance.

My client loves the sage green color. Lucky for us both, I had a few things in my stash at home that really suited her style and taste. One of these was the super cute rooster pitcher to the right of the stove. That was the only piece in the picture above that I helped her with. She found the adorable tins on the left and the coordinating pig pitcher on the right completely on her own.

One of my favorite things to do in a kitchen is to put dish soap, hand soap and lotion into pretty soap dispensers. I then like to place the dispensers on a pretty dish or tray. The result is one of my favorite features in her kitchen. It's so silly, I know, but grouping things together like she did above has such a big impact! The tray she used is a bread plate she already had on hand. She purchased two coordinating soap dispensers for her hand soap and dish soap and then added a matching candle. The tray serves dual purpose. It contains the like items in a pretty display AND it catches the small drips of soap and water that are bound to occur on a daily basis.

Another one of my favorite kitchen tips is pretty storage for your single use coffee cups. My client really liked this idea as well. We found this gorgeous carved wood box on our trip together. It fits seamlessly with the rest of her kitchen style and it hides a good number of those all important coffee cups.

One final side by side comparison of her awesome kitchen. As you can see, there really wasn't a ton to do in the kitchen. It was fun to add just a few super pretty accent pieces and storage. Join me later this week as I share her living area and dining room!
White Party | Monochromatic Entertaining on the Fly
I had the pleasure of hosting some fellow homeschool moms in my home this week for a night a fellowship. I had planned to do desserts, tea and coffee. When I searched for dessert recipes on Pinterest, I looked for "wintry" desserts. While there were no real winners in the recipe department, I noticed over and over people decorating with white and silver for winter tea gatherings. I was inspired.

While my older two were in piano, I made a quick trip to the grocery store and bought pre-baked sugar cookies, already beautiful white cupcakes, some large pink and white marshmallows, white icing and white crystallized sugar. I searched for the pre-made white meringues, but they were out. I also grabbed two bunches of inexpensive white roses.

Most of my home decor and accessories are already cream colored or white, so that part was easy. I just set all the store baked goodies up on the plates and trays I had. I mixed a little bit of milk and rose water with the vanilla icing and dipped half of the sugar cookies. I neglected to get a picture, but they were pretty. Not sure how they tasted. ;o)
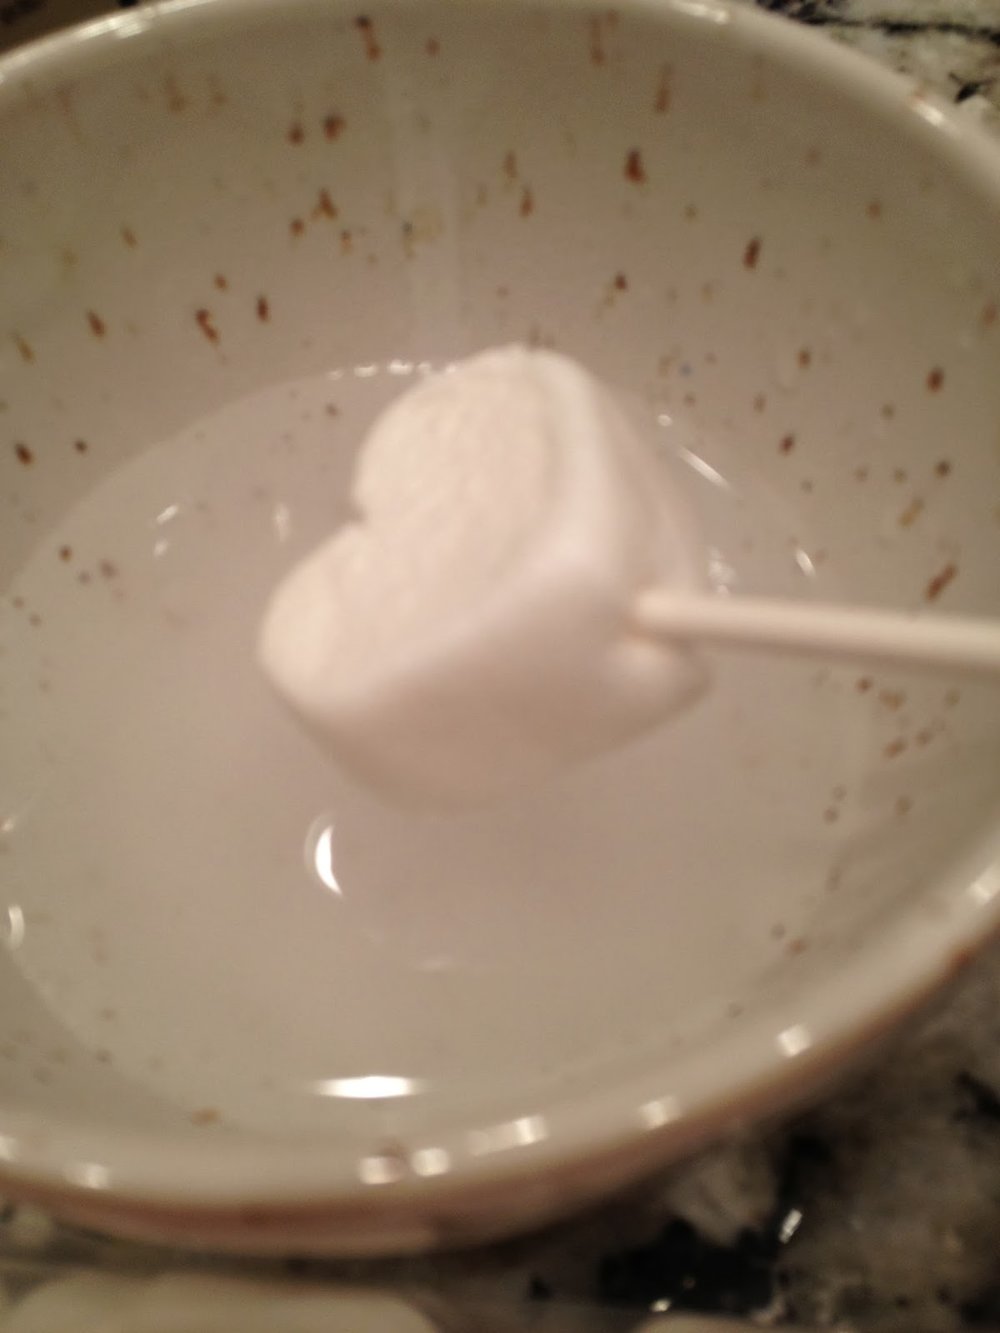
As for those heart shaped marshmallows.... I set the pink ones aside and got to work with the white. This is super easy and super cute. Stick a lollipop stick into the bottom of a jumbo marshmallow. Dip it in water and shake off the excess.
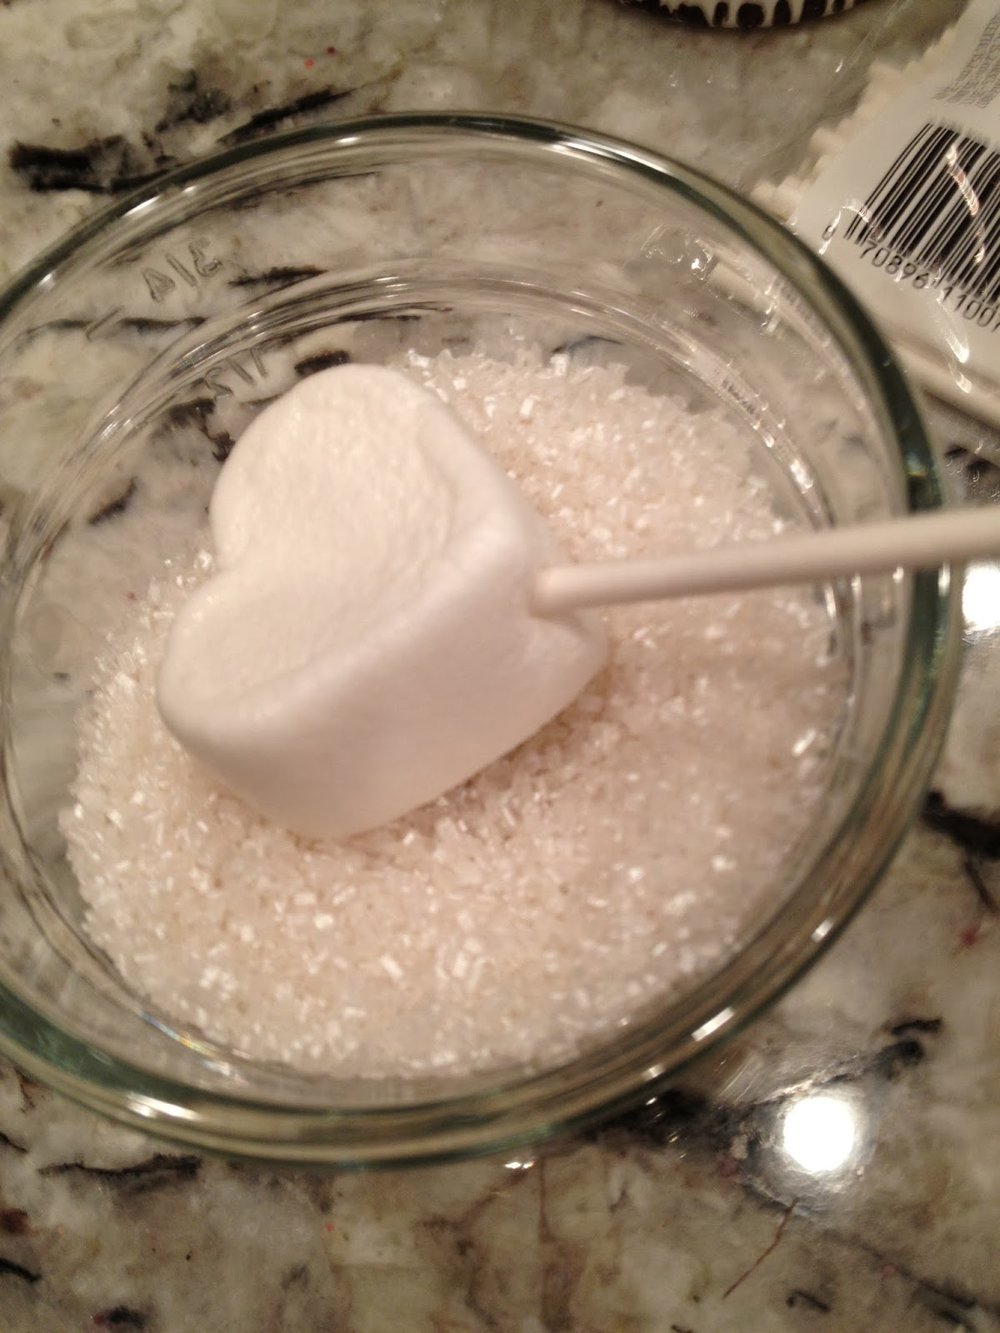
Slowly roll the marshmallow in a bowl with crystallized sugar.
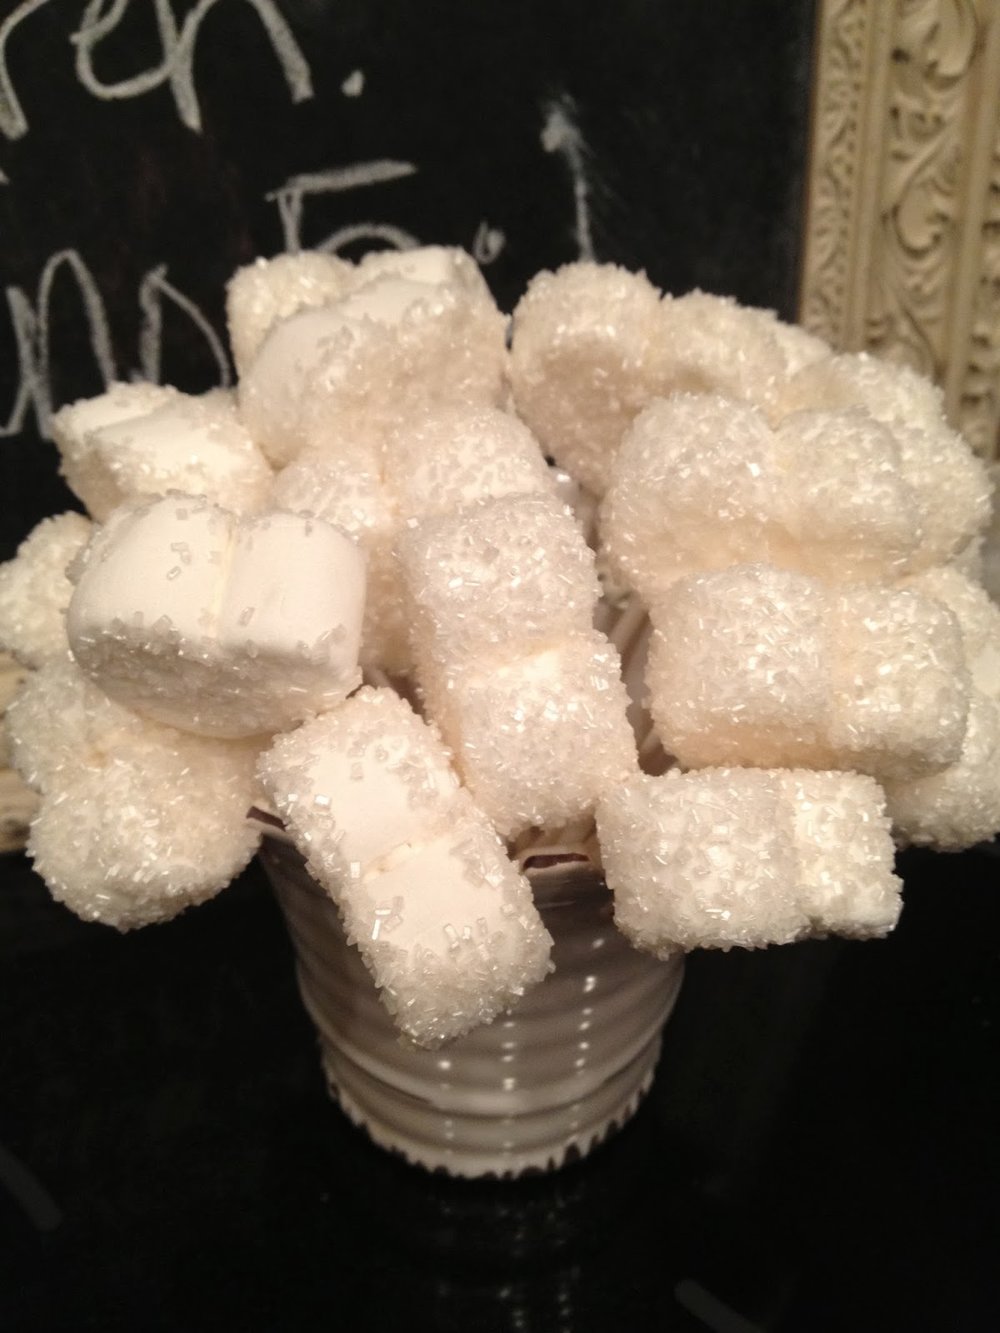
Gently tap off the excess sugar and place in a tall container to let the sugar set. When they are all arranged together, it is a lovely accent piece. I am sure they are quite delicious as well.
Everything I did with the white foods and decor can easily be done with any color of your choice. There is just something so chic about monochromatic decor.

Cake Stand | Kitchen Helper

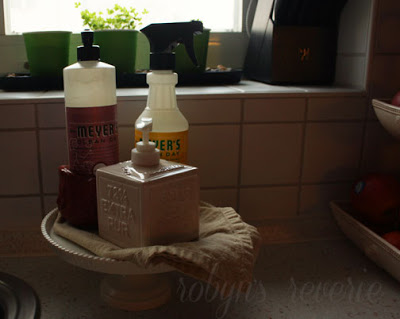
This is one of my favorite things in the kitchen. A medium sized cake plate with a linen towel is such a lovely place to keep your dish soap, hand soap, counter spray and/or whatever other staples you need to have out on the counter.

This is not my original idea. I found something similar when I first joined Pinterest two years ago. (Has it been that long??)
After seeing Natalie's soap stand, I made it my mission to have my own. I love how the idea is the same, but totally my own style. I think that is one of my favorite things of designing: taking a brilliant idea and adapting it to fit my needs.

What are your favorite kitchen helpers?
20 Bags in 20 Days | An Organizational Challenge for YOU!

In my last post, I shared my thoughts on breaking down the clutter in your home. I also shared a great resource to declutter in 2013. Maybe you are looking for a smaller commitment? Maybe you don't have a ton of decluttering to do, but could still use a bit of a refresher. That is where I stand. So, I've come up with this: 20 bags in 20 days. It's not an original idea. I believe the first suggestion was 40 bags in 40 days and I've seen all sorts of numbers in between. I looked at my calendar. I assessed the needs in my home. I realized this could all be done in time for the beginning of Lent. Just imagine: a clear, clean home in time for all the wonderful reflection of the season. I'm excited about it.
So, here's what you do.
1. Grab a trash bag.
2. Go to your designated spot.
3. Set a timer for 15 minutes. Just 15 minutes.
4. Clean out and clear out!
5. Take that bag to the trash, the thrift shop, your neighbor's house... wherever. Just get it out.
6. Sit back, relax, enjoy less stuff.
PS - This is a list I personalized for the needs in my own home. I'm sharing with you all in order to give you an idea of what may need to be done in your home.
PPS - Yes, I do need FOUR days to concentrate on our school closet.
Clutter | Does it ever end?
A very common topic that comes up when I am speaking with others about home decor and organization is clutter control. No matter how hard we try, it seems to never fully go away. I admit that I am constantly working on getting rid of clutter in my own home and it is still always there. I've just gotten good at hiding it.
Last year, I embarked on a decluttering adventure beginning in January. I documented my experiences, including before and after pictures all the way through April. I quit documenting the decluttering process only because taking the pictures, editing them and typing up a post each week was very time consuming. The actual decluttering was not. It was a very simple process and one I'd recommend again in a heartbeat. If you struggle in this area, go visit Beth at My Simpler Life right now. She has an awesome decluttering calendar that breaks it down week by week. I've said this before and I stand behind it 100% today, it is extremely difficult to have a comfortable, pretty and functional home when it is consumed with clutter. I say it in love, but it is true.
My number one tip on keeping clutter under control is to recycle, donate, throw away, get rid of stuff you do not use or need! I admit because we move every 1 to 3 years, I am forced to do this much more often than the average person. I grew up as a packrat, but I have absolutely zero qualms about getting rid of things anymore.
If you don't need it, don't even bring it in the house. Don't accept free samples, gifts, leftover craft supplies, etc. I am extremely tempted by these things. But you know what happens when I do bring home those free samples, leftover craft supplies, or things other people are getting rid of? They sit in my bathroom drawer unused or in a box on the top shelf of our school closet or worse.... they create clutter in my home. I don't need that and you don't either. Just say no to free stuff!! (Unless you will really, truly use it.)
Bring one in, take one out. Better yet, bring one in, take TWO out. This goes for clothing, toys, shoes, dishes, appliances, etc. We let Christmas win this year, but I still very much intend to get this done by the end of January. For every toy my kids received, we will be donating at LEAST one. (hopefully more) We weed through the kids' clothing regularly and send outgrown items to family members or to the thrift shop. I used to save it just in case, but I no longer do that. I do keep a few very sentimental pieces of clothing that belonged to my children, but certainly not everything. * One exception to this would be if you have the space and you know without a doubt there will be a sibling coming up that could use this clothes, go ahead and store it away. I am all for saving money!
So there are my top three tips for cutting back clutter. It isn't easy and it's not always fun, but the result is so, so worth it. Having a clutter free home creates serenity and a place of refuge from our otherwise chaotic life. Take the time to invest in the peace of your family!
That space above the kitchen cabinets & how to tackle it.
A few days ago I posed a question on my facebook page: "What are your trouble spots?" I had a few readers mention that empty space above their kitchen cabinets. How can you make it look warm and how do you do that without spending a lot of money?
Happily, creating a warm, inviting space does not require spending vast amounts of money. All it takes is a little creativity and a lot of scouring. I would suggest hitting up thrift shops, second hand stores and even some fun antique places. Go to the garage sales in your neighborhood and don't forget to swing by the clearance section of Hobby Lobby and Target! Just browse. Look for something that jumps out at you... something that makes you feel warm and happy. Take it home, clean it up and set it out.
I've collected some photographs from various sources of ideas for you. These are things I would do in my own home. If it is necessarily your style, perhaps it can give you a jumping point.
1. Antique Books
This idea is awesome because old books can be found anywhere for a great price. You can stand them on their sides of stack them. Either way adds a charming touch. {both images via pinterest.}


Let's say you find some books with great shape that are the perfect size, but you hate the colors. Don't worry! Simply cover them in kraft paper (or even a brown paper grocery sack!) and stack 'em up. {For example: Mara Zepeda's gorgeous books}

2. Black & White Photos
I absolutely LOVE this idea from Casa Cullen. I think the key to this working is using the same color of frame all the way across. While the photos don't necessarily have to be black and white, I would stick to photos that are the same tone. Don't go with pictures that are too detailed as that will make it look cluttered and busy. Landscape or architectural photos would be ideal.


Hopefully, these ideas will help you as you tackle your own cabinets. Please share any ideas you may have as well! Happy decorating.
Happily, creating a warm, inviting space does not require spending vast amounts of money. All it takes is a little creativity and a lot of scouring. I would suggest hitting up thrift shops, second hand stores and even some fun antique places. Go to the garage sales in your neighborhood and don't forget to swing by the clearance section of Hobby Lobby and Target! Just browse. Look for something that jumps out at you... something that makes you feel warm and happy. Take it home, clean it up and set it out.
I've collected some photographs from various sources of ideas for you. These are things I would do in my own home. If it is necessarily your style, perhaps it can give you a jumping point.
1. Antique Books
This idea is awesome because old books can be found anywhere for a great price. You can stand them on their sides of stack them. Either way adds a charming touch. {both images via pinterest.}
Let's say you find some books with great shape that are the perfect size, but you hate the colors. Don't worry! Simply cover them in kraft paper (or even a brown paper grocery sack!) and stack 'em up. {For example: Mara Zepeda's gorgeous books}
2. Black & White Photos
I absolutely LOVE this idea from Casa Cullen. I think the key to this working is using the same color of frame all the way across. While the photos don't necessarily have to be black and white, I would stick to photos that are the same tone. Don't go with pictures that are too detailed as that will make it look cluttered and busy. Landscape or architectural photos would be ideal.
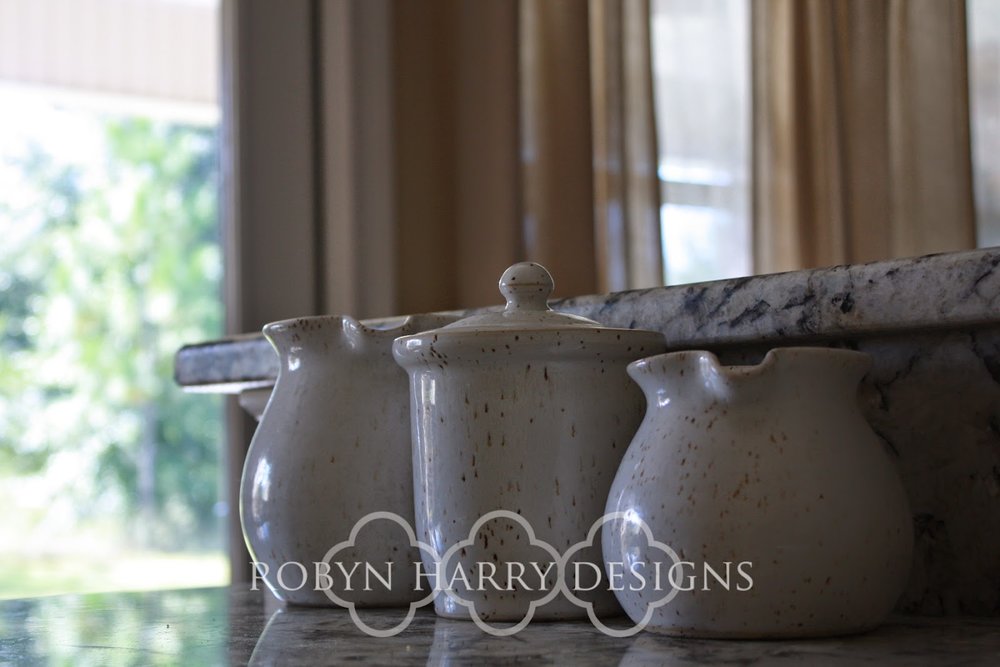
3. Vintage Canisters
I love the way Lu styled these canisters and the baby's breath in just one of them is a perfect touch. If you MUST included greenery or faux flowers on top of those cabinets, this is the way to go. Just a little bit. Gone are the days of stuffing tons of faux greenery up there!
If you are in the market for some canisters and you adore French country, I am in love with this set from Attic Antics. The numbers on them add the perfect industrial touch.
4. Enamelware
I have a small love affair with enamelware. It is no doubt that a collection of these beauties (large or small) would be a lovely addition to the tops of your kitchen cabinets. {photo courtesy of Country Living}
5. Wicker Jugs
These may be a littler harder to find, but I think it would be highly worth it. They are elegant and simple, yet unique. They are a perfect touch to farm kitchen. {photo courtesy of Atlanta Homes Magazine}
Hopefully, these ideas will help you as you tackle your own cabinets. Please share any ideas you may have as well! Happy decorating.
The Makings of a Boy's Room | Part 4
Add Complimentary Storage Options
One thing is for certain: When you have a baby, you will need storage. In the infant months, it's for diapers, wipes and burp cloths. With toddlerhood comes the invasion of toys and the collection just keeps growing from there. It's best to think about storage options from the beginning. I like to try to find versatile pieces that will grow with our needs.
The Expedit Shelving Unit from IKEA is one of my favorites for this reason. We actually purchased it to store toys in our girls' room. When we moved, it became a storage/display piece in the baby's room.

And as he's grown, our needs have changed. We turned it horizontally once again and it's the perfect height for him to play with his toys on... or to climb on and look out his window.

Another one of my favorite storage options is this laundry basket. I know it sounds crazy, but the color of it works nicely with his room and it's just perfect for throwing in those random toys at the end of the day.

And of course, there is the armoire I discussed in my Part 3. No matter what storage options you choose, remember to think outside the box and to think towards the future!